
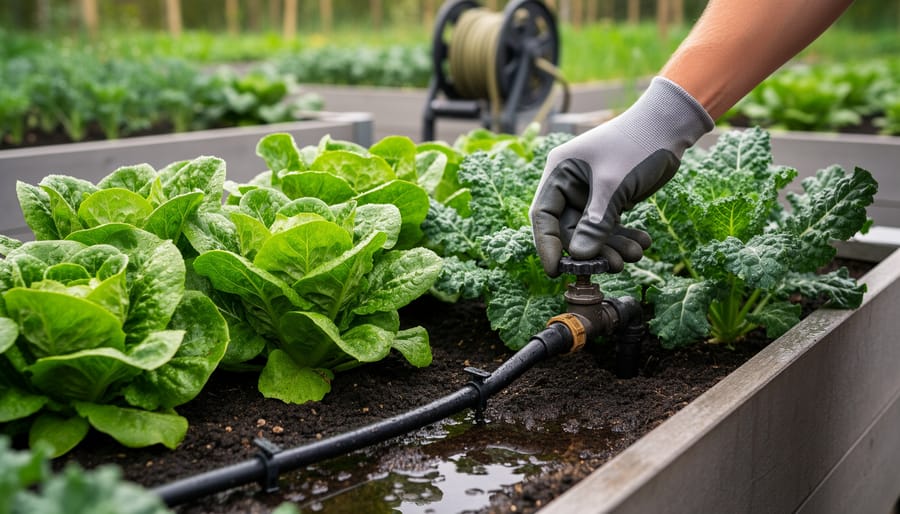
Watering your garden effectively comes down to three essentials: delivering the right amount of moisture to plant roots, choosing a method that fits your garden’s layout, and establishing a consistent schedule that adapts to seasonal changes. Whether you’re hand-watering containers on a patio or installing drip irrigation across vegetable beds, success means understanding when plants need water and how to deliver it without waste.
Most gardens thrive on one to two inches of water per week, depending on soil type, climate, and what you’re growing. Clay soils hold moisture longer than sandy ones. Tomatoes demand more than succulents. These variables matter because overwatering drowns roots and invites disease, while underwatering stunts growth and reduces harvests.
The good news? You don’t need expensive equipment to start. A basic watering can or garden hose serves small spaces perfectly well. As your garden grows, simple upgrades like soaker hoses, drip lines, or timers save hours of manual labor while cutting water bills by 30 to 50 percent compared to sprinklers.
This guide walks you through everything from gathering supplies and setting up your first irrigation system to testing coverage and adjusting for plant needs. You’ll learn how to read your soil, position emitters for maximum efficiency, and troubleshoot common problems like uneven watering or clogged lines. By the end, you’ll have a working system tailored to your garden’s unique conditions and a maintenance routine that keeps plants healthy through every season. Let’s get your garden watered the smart way.
Essential Tools and Materials for Garden Water Management
Building a water-wise garden starts with having the right tools on hand. You don’t need everything at once, but knowing what’s available helps you make smart choices as your system evolves. Here’s what transforms basic watering into efficient water management.
Basic Watering Tools
Start with a quality watering can featuring a removable rose (the sprinkler head) for gentle overhead watering of seedlings and containers. For larger areas, invest in a durable garden hose with adjustable spray nozzles that let you switch from mist to jet. Look for hoses made from lead-free materials, especially if you’re watering edibles.
Irrigation Components
Drip irrigation kits are game-changers for consistent, targeted watering. These kits typically include mainline tubing, emitters that deliver water drop by drop, connectors, stakes, and an adapter for your outdoor tap. You’ll use these when you want to automate watering for garden beds, rows of vegetables, or foundation plantings. Soaker hoses offer a simpler alternative, slowly weeping water along their entire length.
Essential Water Management Supplies
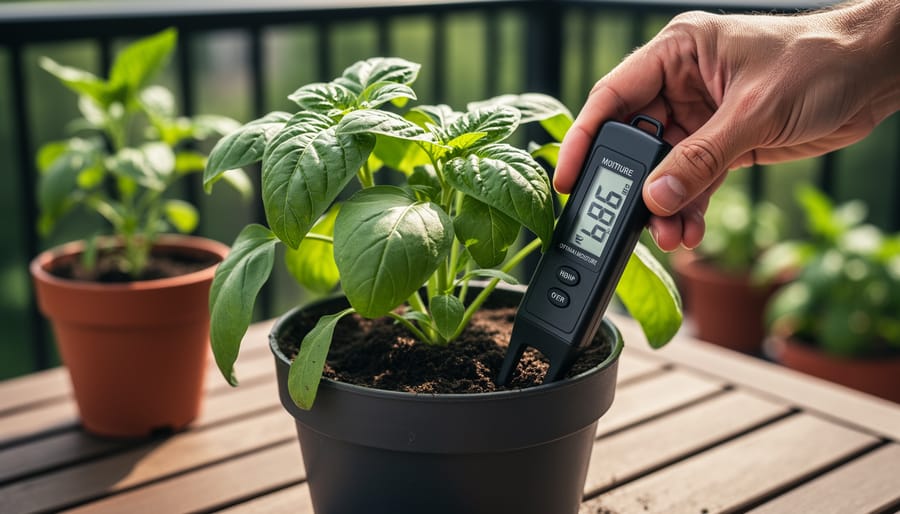
- Soil moisture meters measure water levels at root depth, preventing guesswork and overwatering
- Rain barrels collect roof runoff, providing free water while reducing stormwater waste
- Organic mulch materials like shredded bark, straw, or wood chips reduce evaporation by up to 70 percent
- Programmable timers automate watering schedules, ensuring consistency even when you’re away
- Quick-connect hose fittings let you swap attachments without struggling with threads
- Rain gauges track natural precipitation so you can adjust supplemental watering accordingly
For advanced setups, consider smart irrigation controllers that adjust watering based on weather forecasts and soil conditions. Backflow preventers protect your home’s water supply when connecting irrigation systems, while pressure regulators ensure drip lines don’t burst from excessive water pressure.
The beauty of garden water management lies in starting simple and building your toolkit as you discover what your specific garden needs. Most gardeners begin with a hose and moisture meter, then add complexity season by season.
Before You Begin: Important Water Management Considerations
Before setting up any garden water systems, check with your municipality about local irrigation water restrictions and permitted watering schedules. Many regions enforce specific days and times for outdoor watering, particularly during drought periods, and violations can result in fines. You’ll also want to verify that your planned system complies with backflow prevention requirements to protect your home’s drinking water supply.
Water pressure matters more than you might think. Municipal supply typically delivers 40-60 PSI, which works well for most systems, but well pumps or low-pressure situations may require pressure regulators or booster pumps. Test your pressure with a simple gauge before purchasing components, since drip irrigation systems need specific pressure ranges to function properly. For automated systems, remember that outdoor faucets and exposed pipes need winterization in freezing climates. Drain lines completely and disconnect timers before the first frost, or install frost-proof spigots that shut off water inside your heated foundation wall.
Test your water source quality suitability if you plan to use well water, collected rainwater, or reclaimed greywater. High mineral content can clog emitters, while pH extremes affect nutrient availability for plants. A basic test kit reveals potential issues before you invest in equipment.
Consider drainage patterns carefully. Water should flow away from your home’s foundation, and poorly planned irrigation can create standing pools that breed mosquitoes or saturate soil near basement walls. Walk your garden during heavy rain to identify natural drainage paths, then design your watering zones to work with them rather than against them.
Step-by-Step: Setting Up Your Garden Water Management System
Step 1: Assess Your Garden’s Water Needs
Walk through your garden at different times of day, observing which areas stay damp and which dry out quickly. This simple practice reveals your garden’s unique water personality and guides where you’ll focus your management efforts.
Start by grouping plants with similar water requirements. Succulents and Mediterranean herbs thrive in dry conditions, while vegetables and flowering perennials often need consistent moisture. Sketch a rough map showing these zones so you can water each group appropriately rather than treating the entire garden the same.
Next, test your soil by squeezing a handful. Sandy soil crumbles and drains rapidly, requiring more frequent watering. Clay holds moisture longer but can become waterlogged. Most gardens have a mix, creating microclimates that need different attention.
Note sun exposure throughout the day. South-facing beds in full sun dry faster than shaded northern corners. Wind exposure also matters, plants in exposed areas lose moisture more quickly than those sheltered by walls or hedges.
Finally, identify natural low spots where water collects and high points that drain immediately. These subtle elevation changes shape how water moves through your garden, information that becomes invaluable when you design your delivery systems in the next steps.
Step 2: Install Water Collection Systems
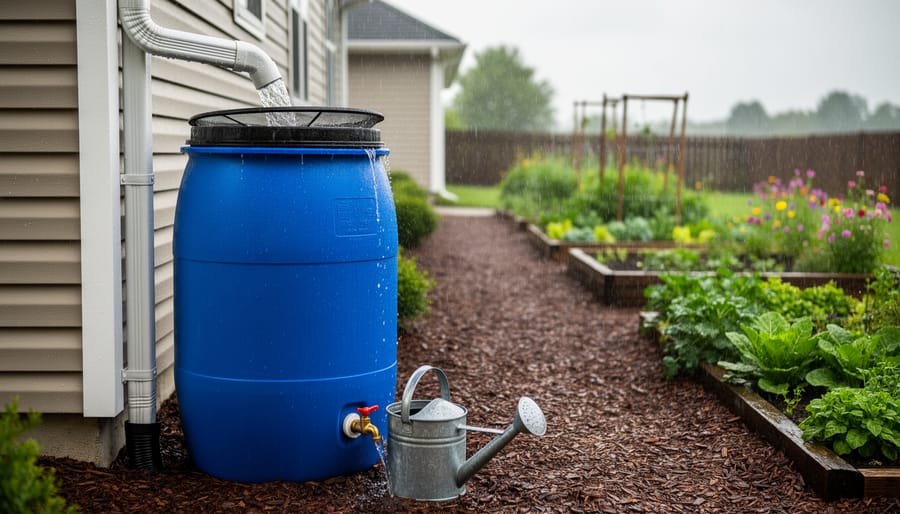
Start with the simplest collection point: your downspouts. Position a 50-gallon rain barrel beneath each gutter downspout that drains a roof area. Elevate the barrel on cinder blocks or a sturdy platform, this creates gravity-fed pressure for filling watering cans and gives you space to slide containers underneath the spigot. Install a mesh screen over the top opening to keep out leaves, mosquito larvae, and debris.
For larger gardens, connect multiple barrels with overflow hoses. When the first barrel fills, excess water flows to the next in line rather than spilling onto the ground. Run your final overflow hose to a garden bed or rain garden, a shallow planted depression that absorbs runoff naturally.
Beyond barrels, create catchment zones in your landscape. Redirect downspouts to swales (gentle ditches lined with river rock) that channel water toward thirsty plantings. In flat yards, dig shallow basins around trees and shrubs to capture rainfall where roots can access it directly.
Check local regulations before installation, some areas restrict rainwater harvesting or require permits for systems over a certain size. Most residential setups need nothing beyond basic screening and periodic cleaning to prevent algae buildup in stored water.
Step 3: Create Efficient Delivery Systems
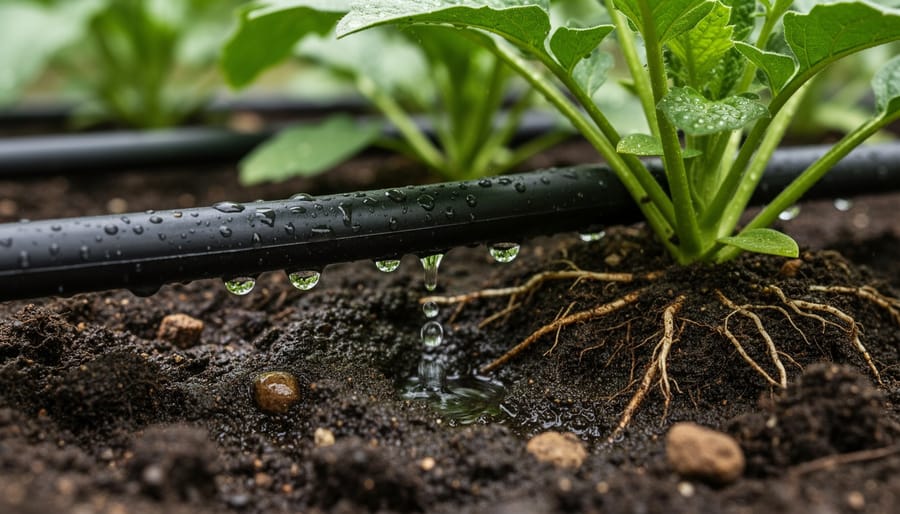
Now you’ll lay the plumbing that delivers water where your plants actually need it. The most efficient systems put water at root level, not on leaves, eliminating waste from evaporation and runoff.
Start with drip irrigation for garden beds and rows. Lay your main line along the bed’s length, then insert emitters every 12-18 inches for vegetables or 24 inches for established perennials. Push each emitter into the tubing near the plant’s drip line, that’s roughly where the outer leaves end, not right at the stem. Stake the lines with landscape pins so they don’t shift when you weed. Run water through for five minutes to flush debris, then cap the end.
For densely planted areas or hedges, soaker hoses work better than individual emitters. Weave them in S-curves through the planting area, keeping runs under 50 feet to maintain pressure. Bury them under an inch of mulch so water seeps directly into soil rather than evaporating from the surface.
Hand-watering zones make sense for containers, newly planted specimens, or small garden areas. If you’re watering by hand, use a wand with a shut-off valve to direct water at the base, not overhead. Group plants with similar needs together so you’re not wasting time zigzagging across the garden.
Test coverage by running the system for 15 minutes, then checking soil moisture with your finger or probe at multiple spots. Dry patches mean you need more emitters; soggy areas signal too many or poor drainage underneath.
Step 4: Add Moisture Retention Measures
Once your irrigation is in place, lock in that moisture so plants can actually use it. Start by spreading a 2-3 inch layer of organic mulch around your plants, keeping it an inch away from stems to prevent rot. Shredded bark, wood chips, or straw work brilliantly to slow evaporation and moderate soil temperature.
Next, improve your gardening soil by mixing in compost or aged manure before planting. This boosts the soil’s water-holding capacity so it acts like a sponge rather than letting moisture drain straight through. For established plants, top-dress with compost in spring and work it into the top few inches.
Create shallow basins around individual plants or entire beds by mounding soil into a low rim. These catch water during irrigation or rainfall and direct it down to the root zone instead of running off. On slopes, terracing or small check-dams serve the same purpose.
Together, mulch, soil amendments, and basins can cut your watering frequency in half while keeping roots consistently hydrated, that’s the efficiency sweet spot every garden needs.
Step 5: Set Up Monitoring and Automation
Automating your garden’s water delivery transforms daily watering from a chore into a set-it-and-forget-it system. Start with a basic hose timer ($20-40) that screws between your tap and hose, program it to run for 15-30 minutes in early morning when evaporation is lowest. For greater precision, add soil moisture sensors that pause watering when the ground is already damp, preventing waste during rainy weeks. Position sensors mid-zone in representative spots, not near sprinkler heads or under dense canopy where readings skew. Create a seasonal schedule: water deeply twice weekly in summer heat, once weekly in spring and fall, and pause entirely in winter unless you’re in arid climates. Adjust run times by 20-30% as temperatures shift, checking your garden weekly at first to ensure plants show no stress or soggy soil.
Testing and Adjusting Your Water Management System
After you’ve installed your water delivery systems, run your first test cycle during daylight hours so you can observe everything in action. Watch for weak spray patterns, leaks at connections, and areas where water pools instead of soaking in. Check each irrigation zone separately, noting how long it takes for water to penetrate the soil rather than just wetting the surface.
Walk your garden 24 hours after watering to identify problem zones. Push your finger two inches into the soil around different plants, it should feel evenly moist, not soggy or dusty. Dry patches signal clogged emitters, inadequate coverage, or competition from tree roots. Waterlogged areas mean you’re delivering too much, your soil drains poorly, or runoff from slopes is concentrating in low spots.
Plant health tells the real story. Wilting in early morning suggests underwatering, while yellow leaves with wet soil indicate overwatering or poor drainage. Adjust your timer settings incrementally, add or subtract five minutes per zone rather than making dramatic changes. Most gardens need different schedules for spring’s active growth versus summer’s heat or autumn’s cooler, shorter days.
Clean clogged drip emitters monthly by unscrewing them and rinsing under pressure, or replace them if buildup persists. Uneven coverage often means you need additional emitters in bare spots or that existing ones are buried under mulch. For sustainable garden pots and containers, which dry faster than ground beds, consider separate zones with shorter, more frequent cycles.
Seasonal adjustments matter more than most gardeners realize. Cut watering frequency by half in autumn, pause entirely during winter dormancy in cold climates, then gradually increase as spring growth accelerates. Your system becomes truly efficient when you treat it as a living part of your garden sculpture, not a fixed installation.
Next Steps: Advancing Your Garden Water Artistry
Once your foundational system is running smoothly, you’re ready to elevate your garden’s water artistry. Smart irrigation controllers represent a significant upgrade, using weather data and soil sensors to adjust watering automatically, saving up to 30% more water than manual timers while keeping plants perfectly hydrated.
Expand your rainwater harvesting beyond a single barrel by linking multiple containers or installing larger underground cisterns. A 300-gallon system can irrigate a medium garden for weeks without touching municipal water. For the truly committed, greywater systems recycle household water from sinks and showers, though check local codes first.
Consider water features that work double-duty: a fountain that aerates while providing drinking spots for birds, or a shallow basin that collects overflow and supports beneficial insects. These elements transform functional infrastructure into living sculpture. Strategic placement of these features also improves water retention across your landscape.
The GardenSculpt community welcomes your water-wise innovations. Share photos of your irrigation setup, exchange tips on seasonal adjustments, or showcase how you’ve turned necessity into beauty. Your experience helps fellow gardeners solve similar challenges, and you’ll discover creative approaches you never imagined, from vertical rain gardens to artistic drip line layouts that create visual patterns while nourishing plants.
Common Garden Water Management Questions
When is the best time to water my garden?
Water early morning, ideally between 5 and 9 a.m., when temperatures are cooler and winds are calm. This timing minimizes evaporation, allows foliage to dry before evening (reducing disease risk), and ensures water reaches roots when plants are beginning their daily growth cycle.
How much water does my garden actually need?
Most established gardens need about one inch of water per week, including rainfall. Stick your finger two inches into the soil, if it feels dry at that depth, it’s time to water. Newly planted areas and containers need more frequent watering, while drought-tolerant plants need less.
Should I choose drip irrigation or soaker hoses?
Drip irrigation works better for gardens with varied plant types because you can target individual plants precisely. Soaker hoses excel in uniform beds like vegetable rows or front landscaping borders where plants have similar needs and spacing.
Why are my plants wilting even though the soil feels wet?
Overwatering can suffocate roots and cause wilting that looks identical to drought stress. Check deeper soil layers, if they’re waterlogged, hold off watering and improve drainage with organic matter or adjust your irrigation schedule to less frequent, deeper watering sessions.
How can I reduce my garden’s water consumption without sacrificing plant health?
Apply three to four inches of organic mulch around plants to cut evaporation by up to 70 percent. Group plants with similar water needs together, replace some thirsty lawn areas with native groundcovers, and collect rainwater in barrels, a single inch of rain on a 1,000-square-foot roof yields about 600 gallons of free irrigation water.
What should I do if parts of my garden are always too dry or too wet?
Map your garden’s microclimates and adjust your approach for each zone. Dry spots near foundations or under eaves may need dedicated irrigation lines, while constantly soggy areas might need French drains, raised beds, or moisture-loving plants that thrive in those conditions rather than fighting them.
These questions come up repeatedly in gardening communities because water management involves balancing multiple factors, weather patterns, soil structure, plant varieties, and your available time. What works perfectly in one garden might need adjustment in yours.
Don’t hesitate to experiment with your system. Start with conservative watering and increase gradually while watching how your plants respond. Yellowing lower leaves or slow growth can signal too little water, while mushy stems or fungal issues often mean too much. Take notes during your first season so you can refine your approach as you learn your garden’s unique personality and needs.
Mastering water management transforms your garden into a thriving ecosystem while lightening your workload and protecting our shared resources. You’ve learned how proper irrigation systems deliver healthier plants with deeper roots, how rainwater harvesting cuts your water bills, and how smart scheduling frees you from constant watering chores. But beyond the practical wins, there’s genuine creative satisfaction in designing a system that works in harmony with your landscape, whether that’s positioning emitters to support your artistic plantings or timing cycles that complement your mowing patterns.
Your water-wise garden is a living sculpture, shaped by thoughtful choices about flow, conservation, and plant placement. We’d love to see what you’ve created. Head to the GardenSculpt community forum to share photos of your irrigation setups, rain barrel installations, or clever moisture-retention techniques. Ask questions, swap solutions, and inspire fellow gardeners who are just starting their water management journey. Every garden tells a story about how we care for the earth beneath our feet.