
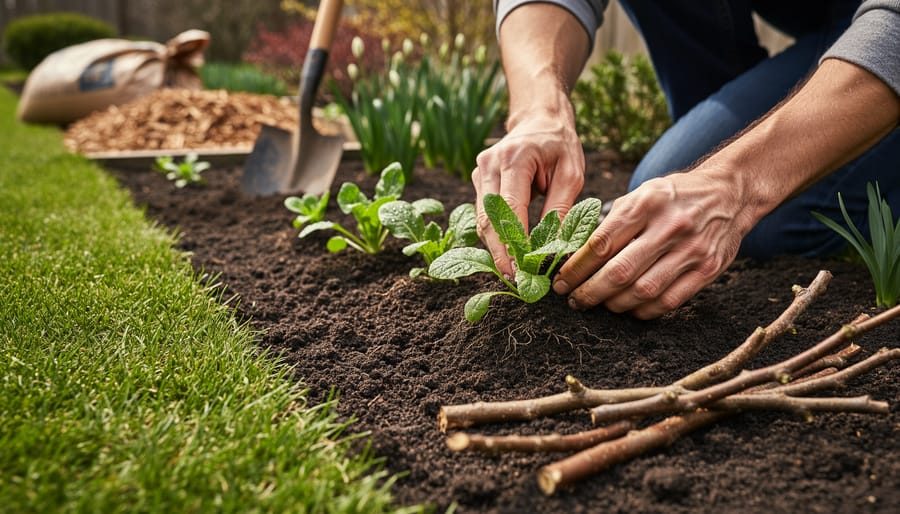
Spring gardening success comes down to twelve foundational tasks that bridge the gap between winter dormancy and summer abundance. The work begins in late winter or early spring when soil temperatures reach 40°F and continues through your region’s last frost date, preparing beds, reviving lawns, and setting the stage for months of growth ahead.
This is the season when your garden resets. The choices you make now about soil health, plant selection, and layout will echo through every harvest and bloom until fall. Whether you’re reclaiming beds buried under winter debris or designing an entirely new space, spring offers a clean slate paired with ideal conditions for nearly every gardening task.
The beauty of spring gardening lies in its dual nature: you’re simultaneously cleaning up last season’s remnants and planting the seeds of this year’s vision. Cool-season vegetables can go straight into the ground weeks before tender annuals. Perennials need dividing. Fruit trees require pruning before leaf-out. The window for each task is specific but forgiving, and getting the sequence right means less work and better results.
What follows is a curated collection of twelve spring gardening strategies that balance practical necessity with creative possibility. These aren’t generic reminders to water your plants. They’re targeted techniques drawn from both horticultural science and garden design, crafted to help you build a space that grows beautifully and produces generously throughout the season.
Why These 12 Tips Will Set Your Garden Up for Success
These twelve tips weren’t plucked from thin air. Each one addresses a critical spring task that experienced gardeners swear by, yet remains accessible enough for newcomers to master. We’ve deliberately paired proven horticultural practices, soil testing, strategic pruning, pest monitoring, with creative design principles that transform routine maintenance into artful expression.
Whether you’re establishing your first vegetable patch or redesigning mature perennial borders, this curated list gives you a clear roadmap. Spring gardening doesn’t have to feel overwhelming. By focusing on foundational tasks that build both plant health and aesthetic interest, you’ll create an outdoor space that reflects your personal style while supporting a thriving ecosystem from the ground up.
1. Test and Amend Your Soil Before Planting
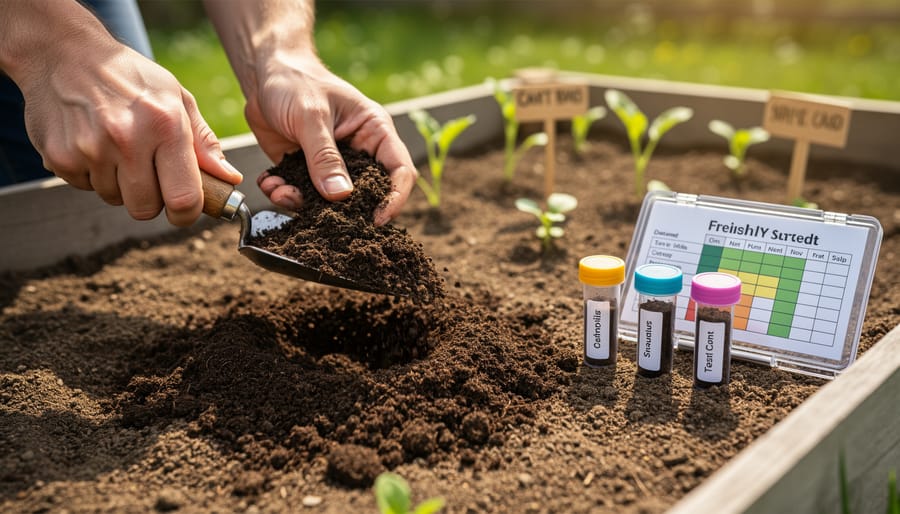
Your garden’s foundation lies beneath the surface. Before you plant a single seedling, testing your soil reveals exactly what your plants will encounter when their roots reach down. A simple DIY kit from your local garden center, or a more detailed lab analysis through your county extension office, tells you the pH level, nutrient content, and organic matter percentage. This information transforms guesswork into precision.
Most spring-blooming perennials and vegetables thrive in slightly acidic to neutral soil (pH 6.0-7.0). If your test shows acidity below 6.0, work in garden lime at the rate specified on your results, typically 25-50 pounds per 1,000 square feet. Alkaline soil above 7.5 benefits from elemental sulfur or organic matter like compost. Speaking of compost, layering two to three inches across your beds and working it into the top six inches enriches any soil type with nutrients and beneficial microbes, it’s the closest thing to a universal amendment.
Peat moss improves drainage in clay-heavy soils but adds little nutrition, so pair it with compost for best results. Understanding gardening soil basics means recognizing that amendments need four to six weeks to integrate fully, so test and amend in early spring, well before your target planting date. Your plants will thank you with vigorous growth and resilient root systems.
2. Clean Up Winter Debris Thoughtfully
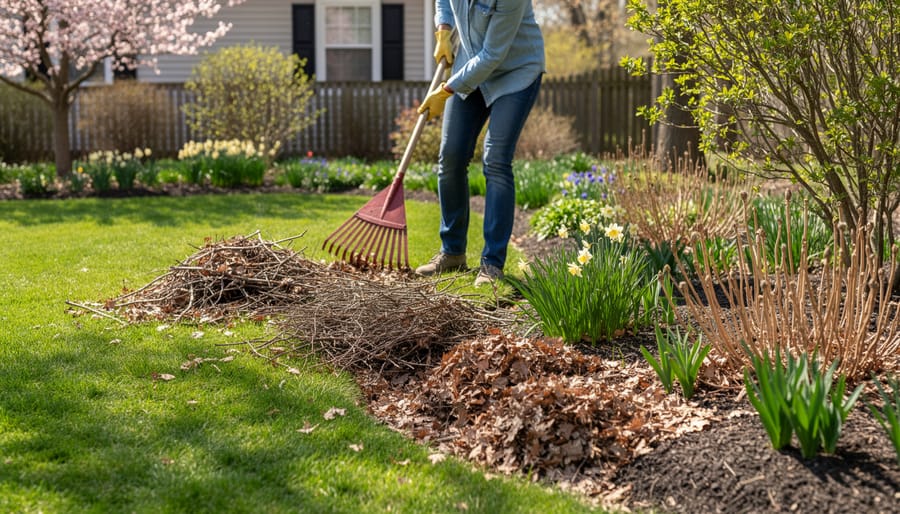
Winter’s mess is also a wildlife refuge, so approach cleanup with intention rather than zeal. Start by removing large branches that could harbor disease or smother emerging plants, then gradually clear dead foliage from perennial beds, but not all at once. Many beneficial insects like native bees and ladybugs overwinter in hollow stems and leaf litter, so a too-thorough cleanup in early spring can eliminate the very allies that keep pests under control later.
Focus first on areas near pathways and focal points where aesthetics matter most, leaving wilder edges intact until temperatures consistently warm. Cut back ornamental grasses and perennial stalks to about 4-6 inches rather than ground level, creating habitat while maintaining a tidy appearance. Rake gently around delicate spring bulbs to avoid damaging emerging shoots.
As you clear, sort debris into compost (disease-free leaves, soft stems) versus yard waste (diseased material, thick branches). Old mulch that’s broken down can be worked into soil as organic matter, while matted layers that suffocate plants should be removed and replaced. This thoughtful approach transforms cleanup from a chore into an opportunity to observe what survived winter and plan your garden’s next chapter with both beauty and biodiversity in mind.
3. Prune Strategically for Shape and Health
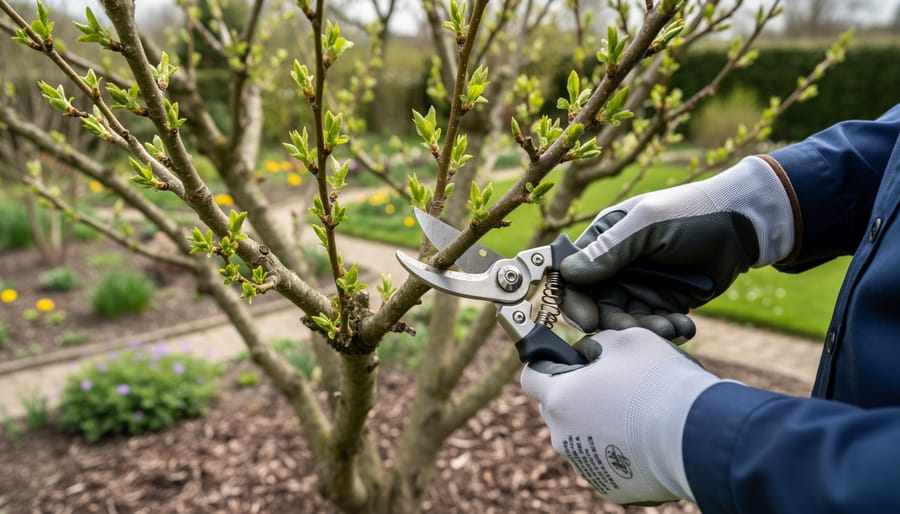
Early spring pruning shapes your garden’s architecture and promotes vigorous blooming, but timing is everything. Summer-blooming shrubs like butterfly bush, crape myrtle, and roses benefit from pruning now because they flower on new wood, growth produced this season. Cut these back by about one-third, making clean cuts just above outward-facing buds at a 45-degree angle to encourage open, balanced forms.
Leave spring bloomers alone. Lilacs, forsythia, azaleas, and flowering quince already set their buds last fall, so pruning them now sacrifices this year’s show. Wait until right after they finish flowering to shape them.
When pruning, step back frequently to assess the plant’s natural form. Think of yourself as revealing the sculpture hidden within rather than imposing a rigid shape. Remove dead, damaged, or crossing branches first, then thin crowded areas to improve air circulation. This prevents disease and lets light reach interior foliage.
For ornamental grasses, cut back last year’s growth to about four inches before new shoots emerge. Prune climbing roses by removing weak canes and shortening main stems by one-third, training them along supports for dramatic vertical interest that complements clean mowing patterns in surrounding lawn areas.
Always use sharp, clean tools. Dull blades crush stems and invite infection. A simple wipe with rubbing alcohol between plants prevents disease transmission and keeps your garden healthy from the start.
4. Start Seeds Indoors for a Head Start
Starting seeds indoors six to eight weeks before your region’s last frost date gives you access to plant varieties you won’t find at any nursery, while saving serious money compared to buying flats of transplants. A packet of heirloom tomato seeds costing four dollars can yield thirty seedlings, each mature plant worth eight to twelve dollars at retail. This window lets you experiment with unusual colors, rare cultivars, and regionally adapted varieties that transform your garden into something distinctly yours.
You don’t need fancy equipment. Clean yogurt cups, egg cartons, or proper seed trays all work, provided they have drainage holes punched in the bottom. Fill containers with sterile seed-starting mix, not garden soil, which compacts and harbors diseases. Plant seeds at the depth listed on the packet, usually two to three times the seed’s width, and mist the surface rather than drenching it.
For beginners, these options germinate reliably and tolerate minor care mistakes:
- Tomatoes and peppers (warm-season vegetables with long growing seasons)
- Basil and parsley (herbs that transplant easily)
- Marigolds and zinnias (cheerful annuals that bloom prolifically)
- Cosmos and sunflowers (tall, architectural flowers for vertical interest)
Place trays under grow lights or on a sunny windowsill where they receive fourteen to sixteen hours of light daily. Seedlings stretching toward the window with thin, pale stems need more light. Keep soil consistently moist but not waterlogged, and maintain room temperature between 65-75°F for most species.
Two weeks before transplanting outdoors, begin hardening off seedlings by moving them outside for a few hours daily, gradually increasing exposure to wind and direct sun. This toughens cell walls and prevents transplant shock when they finally meet the garden.
5. Plan Your Garden Layout with Art in Mind
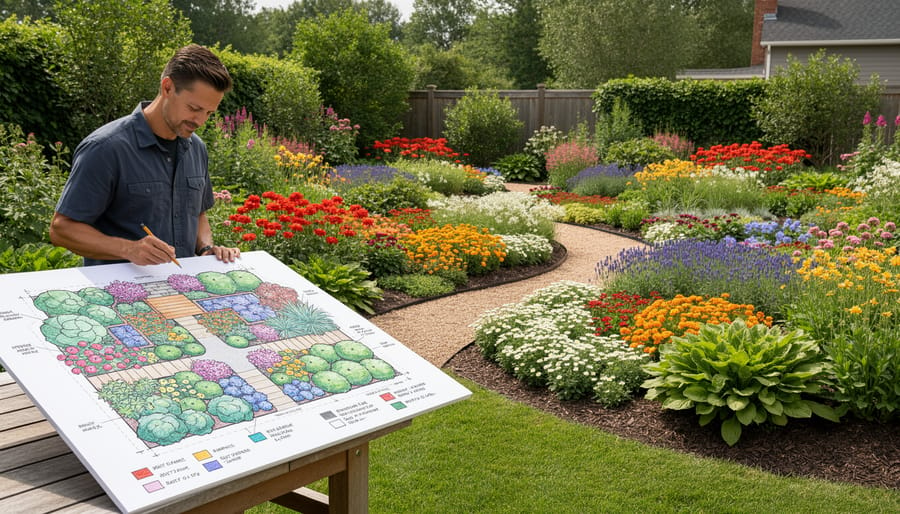
Think of your garden as a living painting that changes with the season. Before you dig the first hole, grab paper and colored pencils to sketch your vision.
Start by mapping your beds to scale, noting sun exposure throughout the day. Place taller plants, delphiniums, sunflowers, ornamental grasses, toward the back or center of beds so they don’t hide shorter companions. Layer medium-height perennials in the middle, then edge with low-growers like creeping phlox or sweet alyssum.
Color theory transforms ordinary plantings into stunning compositions. Try complementary pairings like purple salvia with yellow coreopsis, or create a monochromatic scheme using whites and silvers for nighttime drama. Consider bloom succession carefully. Plant early bulbs (tulips, daffodils) alongside mid-spring perennials (bleeding heart, columbine) and late-spring bloomers (peonies, irises) so something’s always catching the eye.
Establish focal points where visitors naturally pause, a specimen tree, an artful container, or a sculptural shrub like contorted filbert. Use repetition of key plants to create rhythm, guiding the eye through your composition.
Spring’s the perfect time for this creative planning because you can still see the garden’s bones before summer’s abundance fills every space. Your sketch becomes a working document you’ll refine season after season.
6. Divide and Transplant Perennials
Early spring, just as new shoots emerge, is your window to divide perennials that have grown too thick or stopped flowering vigorously. Overcrowded clumps compete for nutrients and light, producing smaller blooms and weaker growth. Dividing them now rejuvenates the mother plant and gives you free stock to expand your design or share with fellow gardeners.
Start with hostas, daylilies, and ornamental grasses, workhorses that tolerate division well. Dig around the entire root ball, lifting it carefully with a spade or garden fork. For hostas and daylilies, you can often pull sections apart by hand or slice through with a sharp knife, ensuring each division has at least three to five healthy shoots and a solid root mass. Ornamental grasses may need a saw or two forks inserted back-to-back to pry the dense crown apart.
Replant divisions immediately at the same depth they grew before, spacing them according to their mature width. Water thoroughly to settle soil around roots and eliminate air pockets, proper water management in the first few weeks determines whether divisions establish quickly or languish. Mulch lightly to retain moisture.
Think of division as sculpting with living material: you’re reshaping the garden’s bones, creating repeating rhythms of color and texture that unify the whole composition.
7. Apply Fresh Mulch for Moisture and Aesthetics
Mulching is one of those tasks that delivers both immediate visual impact and lasting functional benefits. A fresh layer of mulch transforms garden beds from rough sketches into finished compositions while working behind the scenes to support plant health all season long.
Start by choosing your material. Organic mulches, shredded bark, wood chips, cocoa hulls, or composted leaves, break down gradually, enriching the soil as they decompose. They’re ideal for perennial beds and shrub borders where you want long-term soil improvement. Inorganic options like stone or rubber stay put indefinitely and work well in low-water gardens or around structural plantings, though they won’t feed the soil.
Aim for a two- to three-inch layer across the entire bed. Too thin won’t suppress weeds or hold moisture effectively. Too thick can suffocate plant roots and create havens for slugs and disease. Pull mulch back a few inches from plant stems and tree trunks to prevent rot.
The payoff is substantial. Mulch moderates soil temperature, cuts water evaporation by up to fifty percent, and chokes out weed seedlings before they establish. It also creates that unified, intentional look, like a gallery wall framing your living art. By mid-spring, freshly mulched beds signal that a gardener cares about every detail.
8. Install or Repair Irrigation Systems Early
Early spring is the perfect window to inspect and install irrigation systems while the ground is still accessible and plants are small. A well-functioning system delivers consistent moisture exactly where roots need it, reducing water waste and giving new transplants the steady hydration they crave.
Start by walking your garden beds and checking existing drip lines for clogs, cracks, or disconnected emitters. Turn the system on briefly and watch for leaks or weak spots where water pools rather than soaks in. Soaker hoses may have developed holes over winter; replace worn sections now before they flood pathways or miss critical root zones. If you’re using overhead sprinklers, clean the heads and verify coverage patterns haven’t shifted, spring winds and settling soil can throw aim off by several feet.
For new installations, consider drip irrigation over sprinklers. It places water directly at the root zone, minimizes evaporation, and keeps foliage dry, which reduces disease risk. Lay lines along bed edges before mulching, positioning emitters near each plant’s drip line. Use a timer to automate watering schedules, early morning is ideal, giving plants time to absorb moisture before heat sets in.
If installing feels overwhelming, start simple: a single soaker hose on a battery timer can transform a struggling vegetable bed. Getting the infrastructure in place now means you won’t scramble during July’s heat wave, and your artfully designed plantings will thrive rather than merely survive.
9. Feed Your Plants with Slow-Release Fertilizer
Spring feeding sets the stage for months of lush growth, but timing and product choice matter. After your soil warms to around 50°F (typically mid-to-late spring in most zones), plants wake up hungry and ready to absorb nutrients.
Start by understanding N-P-K ratios, the three numbers on every fertilizer label. Nitrogen (N) drives leafy growth, phosphorus (P) supports root development and flowering, and potassium (K) strengthens overall plant health. For spring, a balanced ratio like 10-10-10 works well for general garden beds, while a higher-nitrogen formula (like 20-10-10) benefits lawns and foliage-heavy displays in sculptural garden pots.
Slow-release fertilizers, whether organic (compost, fish emulsion, bone meal) or synthetic coated granules, deliver nutrients gradually over 6-12 weeks, reducing the risk of burning tender roots and eliminating the need for constant reapplication. Apply granules evenly around the drip line of plants (not against stems), then water thoroughly to activate.
For curb appeal landscaping feed established perennials and shrubs just as new growth emerges. Avoid fertilizing before a heavy rain, which can wash nutrients away before plants absorb them. One spring application typically sustains plants until a lighter midsummer feeding, keeping your garden vibrant without overloading the soil ecosystem.
10. Watch for Pests and Diseases Early
Spring is when your garden wakes up, but so do aphids, slugs, fungal spores, and countless other threats. Catching these problems early, before they spiral into infestations or disease outbreaks, saves you time, money, and heartbreak later.
Walk your garden beds at least twice a week, inspecting both sides of leaves, stems, and soil surfaces. Look for telltale signs: yellowing foliage, sticky residue, chewed edges, webbing, or wilting despite adequate water. Early detection means you can intervene gently rather than reaching for harsh chemicals.
Integrated pest management treats your garden as an ecosystem. Start with the least invasive solutions. Handpick beetles and caterpillars into a bucket of soapy water. Blast aphids off plants with a strong spray from the hose. For persistent soft-bodied insects, mix one tablespoon of neem oil with a quart of water and spray affected plants in the evening to avoid burning foliage.
Companion planting acts as natural pest control. Marigolds deter aphids, basil repels whiteflies, and nasturtiums serve as sacrificial plants that draw pests away from prized vegetables. Encourage beneficial predators like ladybugs and lacewings by planting dill, yarrow, or leaving a small section of your garden slightly wild.
Most diseases thrive in wet, crowded conditions. Space plants properly for air circulation, water at soil level rather than overhead, and remove any diseased foliage immediately to prevent spread.
11. Add Hardscape or Garden Art Features
Spring offers the perfect window to introduce hardscape and sculptural elements before your garden fills with lush growth. These permanent features provide structure, define spaces, and deliver visual interest even when plants go dormant.
Consider adding a stone pathway that guides visitors through your garden beds, or position a striking trellis as a vertical focal point for climbing roses later in the season. Bird baths and decorative urns serve double duty, they attract wildlife while functioning as living sculptures that anchor your design.
DIY art pieces bring personal flair without breaking your budget. Repurpose old tools into whimsical garden markers, stack stones into cairns, or paint terra cotta pots in bold patterns that echo your color scheme. Even a simple wooden obelisk becomes art when morning glories spiral up its frame by midsummer.
Install these elements now while the ground is workable and you can see your garden’s bones clearly. You’ll avoid trampling emerging plants or disturbing established root systems. Position larger pieces first, then arrange smaller accents to create rhythm and balance.
These features transform your garden from a collection of plants into a cohesive outdoor gallery where nature and artistry merge seamlessly.
12. Document Your Garden Progress
One of the most valuable habits you can develop as a gardener is documenting your progress throughout the season. Start by taking weekly photos from the same angles to capture your garden’s transformation, these visual records reveal patterns you might otherwise miss and create a stunning before-and-after narrative of your outdoor space. Your phone’s camera is all you need, though note the date and a few key details with each shot.
Pair your photos with a simple garden journal. A notebook or digital document works equally well. Track essential information that will guide your decisions next year:
- Planting dates for seeds and transplants
- Weather patterns, including last frost date and unusual temperature swings
- Pest and disease issues, along with what treatments worked
- Design ideas, color combinations that succeeded or clashed, and layout changes to consider
This record becomes your personalized guide, far more useful than generic advice because it reflects your specific microclimate, soil conditions, and aesthetic preferences. Note which perennials thrived versus which struggled, where you need more height or a different bloom time, and which garden art pieces created the focal points you envisioned. When you revisit your notes next spring, you’ll make smarter choices about amendments, plant placement, and timing. Plus, sharing your documented journey with fellow gardeners sparks conversations and inspires others to view their own spaces as evolving works of art.
Your Spring Garden Awaits
Spring is your invitation to step outside and create something extraordinary. These 12 tips aren’t just tasks to check off, they’re the foundation for transforming your outdoor space into a living work of art that evolves throughout the growing season.
Whether you’re testing soil, pruning with intention, or adding sculptural elements that catch the light, remember that gardening rewards both the practical and the imaginative. Each choice you make shapes not only this season’s garden but also your skills and vision for years to come.
We’d love to see how your spring garden unfolds. Share photos of your progress, swap stories about what’s thriving, and pick up inspiration from fellow gardeners in the GardenSculpt community forum. And don’t miss our upcoming Spring Garden Showcase contest, your transformed space could be featured and celebrated.
Your garden awaits. Go make it yours.
Frequently Asked Questions
When is it safe to plant after the last frost?
Wait until your soil temperature reaches at least 60°F and nighttime temperatures consistently stay above 50°F. Hardy annuals and cool-season vegetables can go in slightly earlier, but tender plants like tomatoes and peppers need genuinely warm conditions to thrive rather than merely survive.
How can I prevent weeds organically without chemicals?
Layer 2-3 inches of mulch around plants to block light and suppress weed seeds, hand-pull weeds when soil is moist to get the entire root, and use landscape fabric under pathways. Corn gluten meal applied in early spring acts as a natural pre-emergent herbicide for lawns.
What should I do if a late spring freeze is forecast?
Cover tender plants with old sheets, frost blankets, or even cardboard boxes in the evening, avoid plastic, which conducts cold. Water the soil beforehand since moist soil retains heat better than dry, and remove coverings in the morning once temperatures rise above freezing.
How do I balance a beautiful garden design with plant health needs?
Choose plants suited to your site’s actual conditions first, then arrange them artistically rather than forcing incompatible plants into a vision. Healthy plants are always more beautiful than struggling specimens, and you can achieve stunning compositions by grouping the right plants in color drifts, varied heights, and textural contrasts.
These questions come up repeatedly in the GardenSculpt community forum each spring, and the answers reflect both horticultural science and real-world experience. Remember that gardening involves continuous learning, what works brilliantly one year might need adjustment the next based on weather patterns, soil changes, and your evolving design vision. Don’t hesitate to experiment, document what happens, and share your discoveries with fellow gardeners.