
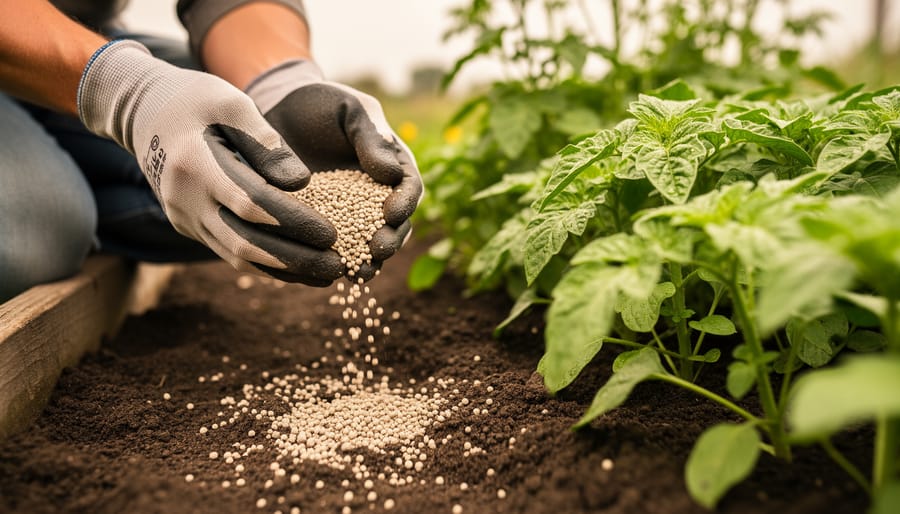
Plant fertilization is the process of supplementing your garden soil with essential nutrients, nitrogen, phosphorus, and potassium, plus trace minerals, to fuel healthy plant growth, vibrant blooms, and robust harvests. For home gardeners, mastering this process means understanding both the science behind nutrient uptake and the practical techniques that deliver those nutrients where your plants need them most. Before you reach for that bag of fertilizer, though, you’ll want to know what plant fertilization is at its core and why timing, soil conditions, and application methods make all the difference between thriving plants and wasted effort.
Think of fertilization as feeding your garden’s underground ecosystem. Plants absorb nutrients through their roots in water-soluble forms, but not all soils hold or release these nutrients equally. Sandy soils drain quickly and lose nutrients fast. Clay-heavy soils cling to nutrients but make them harder for roots to access. Your job as a gardener is to bridge that gap, matching the right fertilizer type and application technique to your soil’s personality and your plants’ appetites.
This guide walks you through the complete fertilization plant process, from testing your soil and choosing between granular, liquid, or organic amendments to applying them safely and monitoring results throughout the growing season. You’ll learn when to fertilize (and when not to), how to avoid common pitfalls like nutrient burn, and where to find reliable expertise when your garden poses unique challenges. Whether you’re nourishing a vegetable patch, coaxing perennials into bloom, or designing an outdoor space that doubles as living art, getting fertilization right transforms good gardening into great gardening.
What Is the Fertilization Plant Process?
The Science Behind Nutrient Uptake
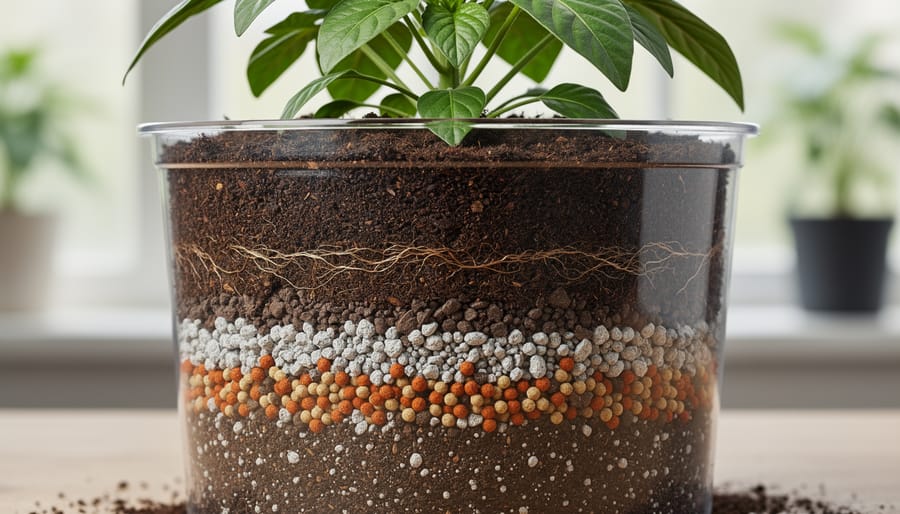
Plants absorb nutrients through their roots in a remarkably selective process that depends heavily on how gardening soil works. Root hairs extend into tiny soil pores, drawing in dissolved nutrients through both passive diffusion and active transport, essentially pumping specific elements against concentration gradients when needed. This uptake happens in the soil solution, which is why moisture levels matter so much for fertilizer effectiveness.
Soil pH affects nutrient availability dramatically. At pH 6.0-7.0, most nutrients dissolve readily and remain accessible to roots. Below 5.5, aluminum and manganese can become toxic, while iron and phosphorus lock up above 7.5. When you apply fertilizer to acidic or alkaline soil, some nutrients may bind to soil particles and become unavailable despite being present.
Different fertilization methods work around these limitations. Foliar feeding bypasses soil chemistry entirely by delivering nutrients directly through leaf stomata. Fertigation systems maintain consistent nutrient concentrations in the root zone. Slow-release granules dissolve gradually, reducing the feast-or-famine cycle that overwhelms roots and wastes nutrients through leaching.
Types of Fertilization Plant Processes
Gardeners have four main fertilization methods to choose from, each working through different mechanisms to feed plants.
Soil application is the most traditional approach, you spread granular or liquid fertilizer directly onto the ground around plants. Roots then absorb nutrients as they dissolve in soil moisture. This method works well for established gardens but requires adequate watering to activate.
Foliar feeding delivers nutrients through the leaves instead. You spray diluted liquid fertilizer directly onto foliage, where tiny pores called stomata absorb it. Plants get nutrients within hours rather than days, making this ideal for correcting deficiencies quickly, though it’s not a complete replacement for root feeding.
Fertigation combines fertilization with irrigation systems. Water-soluble nutrients flow through drip lines or sprinklers, delivering food precisely where roots grow. This automated approach reduces waste and provides steady nutrition, particularly valuable for container gardens and vegetable beds.
Slow-release systems use specially coated granules that break down gradually over weeks or months. Temperature and moisture control the release rate, providing consistent feeding without frequent applications. These work brilliantly for low-maintenance plantings and reduce the risk of nutrient burn from over-application.
Which Plants and Gardens Benefit Most?
Soil Type and Condition Requirements
Understanding your soil’s unique characteristics helps you choose the fertilization method that will actually work. Start by examining your soil’s texture, squeeze a handful of moist soil. Sandy soils feel gritty and won’t hold a ball shape, meaning nutrients wash through quickly and frequent, lighter applications work better than heavy feeding. Clay soils form a tight ball and drain slowly, so they hold nutrients longer but may need amendments to improve access. Loamy soil, the gardener’s dream, crumbles easily and accepts most fertilization approaches.
Test your soil pH using an inexpensive kit from any garden center. Most plants thrive between 6.0 and 7.0, but acid-lovers like azaleas prefer 5.0 to 6.0, while lilacs want slightly alkaline conditions. pH directly controls which nutrients your plants can absorb, iron becomes unavailable in alkaline soil no matter how much you add. If your pH is off, correct it before fertilizing or you’ll waste your efforts.
Check drainage by digging a 12-inch hole, filling it with water, and timing how long it takes to drain. Two to six hours indicates good drainage suitable for standard fertilization; longer suggests you need raised beds or specialized techniques. The principles apply whether you’re working with ground beds or fertilizing potted plants though containers require more frequent feeding since nutrients leach out faster. A professional soil test from your extension service reveals existing nutrient levels and prevents you from adding what’s already abundant.
Plant Growth Stage Considerations
Plants have vastly different nutritional needs as they progress through life stages, and matching your fertilization approach to these stages prevents waste and supports optimal growth. Seedlings require gentle, diluted fertilizers with higher phosphorus to establish strong root systems, think half-strength liquid applications every two to three weeks. Once plants reach their vegetative stage with established roots and active leaf production, they benefit from nitrogen-rich fertilizers applied at full strength to fuel foliage development.
When plants transition to flowering or fruiting, shift to formulations higher in phosphorus and potassium while reducing nitrogen, which otherwise promotes leafy growth at the expense of blooms. Apply these bloom-boosting fertilizers weekly during peak flowering for annuals, or monthly for perennials and shrubs.
During dormancy in fall and winter, most plants need little to no fertilization. Stop feeding six to eight weeks before the first expected frost to avoid stimulating tender new growth that cold will damage. Evergreens and winter-active plants may accept a single light feeding in early fall, but skip fertilization entirely from late autumn through early spring for deciduous species.
Climate and Seasonal Timing
Temperature plays a crucial role in how plants absorb nutrients. When soil temperatures drop below 50°F, root activity slows dramatically, making fertilization largely ineffective regardless of the product you apply. Most nutrients remain unavailable until the soil warms in spring.
Time your fertilization to match your region’s growing season. In temperate climates, early spring applications work best for perennials and lawns as roots activate. Summer fertilization supports flowering and fruiting plants during their peak growth, but avoid applying during heat waves above 85°F when plants experience stress and nutrient uptake stalls.
Rainfall patterns matter significantly. Heavy spring rains can wash away surface-applied fertilizers before plants absorb them. Apply water-soluble fertilizers just before light rain or irrigation, but never before thunderstorms. In dry seasons, water thoroughly after applying granular fertilizers to move nutrients into the root zone.
Stop fertilizing six weeks before your first expected frost. Late-season applications encourage tender new growth that won’t harden off before winter, leaving plants vulnerable to cold damage.
How to Apply the Fertilization Process in Your Garden
Preparing Your Garden for Fertilization
Before you apply any fertilizer, you need to know what your soil actually needs. Start with a soil test, grab a kit from your local extension office or garden center, or order one online. Collect samples from multiple spots in your garden, mixing them together for an accurate reading. The results will show your pH level and existing nutrient concentrations.
Once you have your test results, calculate how much fertilizer you’ll need. The report typically suggests application rates based on your soil’s deficiencies. Don’t guess at this step, over-fertilizing wastes money and can burn your plants.
Next, choose your fertilizer type. Match it to your soil test recommendations and the specific plants you’re growing. Fast-release granules work differently than slow-release pellets or liquid concentrates, so read labels carefully.
Gather your equipment before you begin: spreader or sprayer, measuring cup, gloves, watering can or hose, and a notebook to record what you applied and when. Having everything ready prevents mistakes and ensures even application across your garden beds.
Application Techniques by Method
Broadcasting granular fertilizer across your soil surface works well for established gardens and lawns. Spread the product evenly using a handheld spreader or your gloved hand, walking in a grid pattern to avoid missing spots or doubling up. Water thoroughly afterward to dissolve the granules and carry nutrients down to root level.
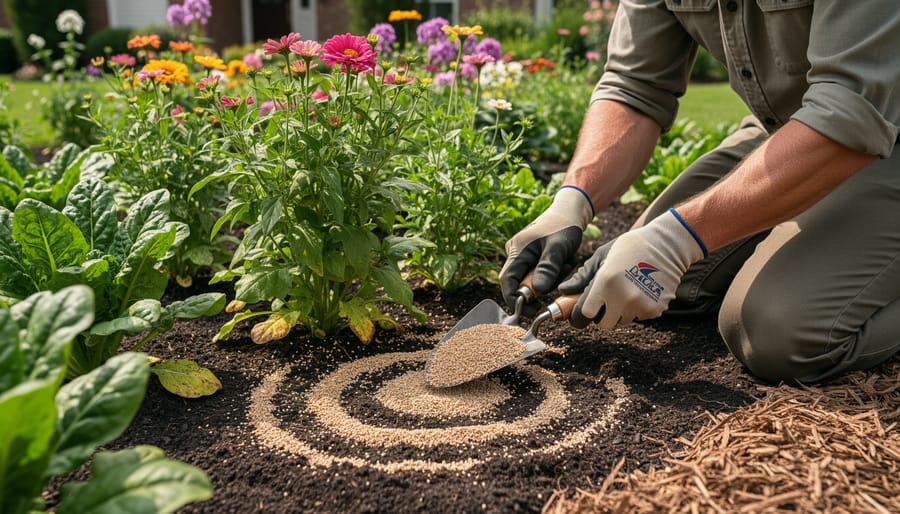
Side-dressing delivers concentrated nutrition to individual plants during their growing season. Create a shallow trench or circle 4-6 inches from the plant stem, sprinkle granular fertilizer along this line, and cover lightly with soil. This method targets feeding zones without disturbing roots.
Foliar spraying applies liquid nutrients directly to leaves for rapid absorption. Mix your fertilizer according to label instructions, typically one tablespoon per gallon for general feeding. Spray early morning or late evening when stomata are open and evaporation is minimal. Coat both leaf surfaces until you see slight dripping, but never spray in full sun or you’ll risk leaf burn.
Fertigation systems inject liquid fertilizer into irrigation lines for steady, automated feeding. Install a fertilizer injector between your water source and drip lines or sprinklers. Start with quarter-strength solutions and monitor plants for response. This method excels for container gardens and raised beds where you can precisely control nutrient delivery throughout the growing season.
Timing and Frequency Guidelines
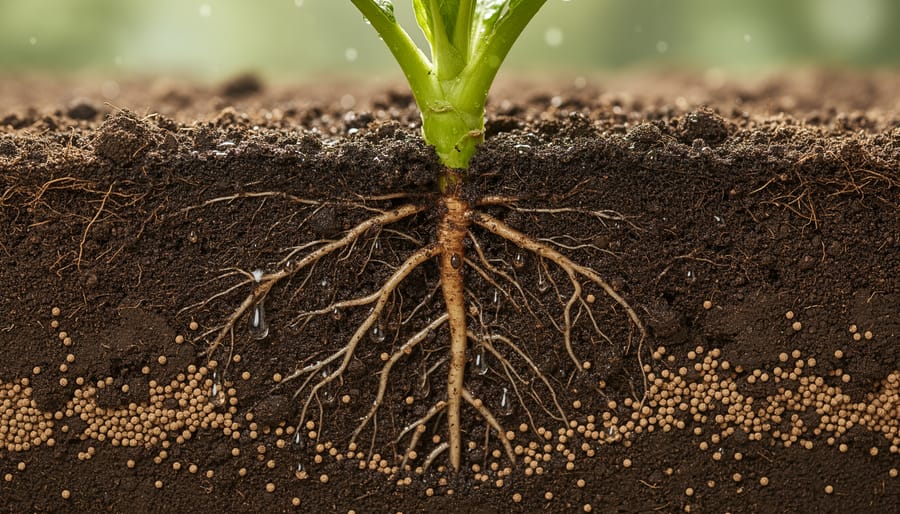
Frequency depends on fertilizer formulation and plant demands. Fast-release synthetics require applications every 4-6 weeks during active growth, while slow-release granules feed for 2-4 months per application. Most annuals need monthly feeding through their blooming season. Perennials typically require just 2-3 applications yearly, early spring as growth begins, mid-season during peak growth, and sometimes a light fall feeding before dormancy. Trees and shrubs often thrive on a single spring application.
Coordinate fertilization with smart water management and seasonal timing tips for best results. Stop fertilizing 6-8 weeks before your first expected frost to avoid pushing tender new growth that won’t harden off.
Over-fertilization shows up as leaf burn, excessive foliage with few flowers, or salt crusts on soil surfaces. Applying more than crops need wastes resources and harms waterways. Always follow label rates, more is not better. If plants look healthy and grow steadily, reduce frequency rather than sticking to a rigid schedule.
Your Rights and Responsibilities as a Gardener
Environmental Protection Practices
Protecting the environment when fertilizing starts with timing your applications around weather patterns. Check the forecast and avoid fertilizing within 24 to 48 hours before expected rain, runoff from heavy downpours carries dissolved nutrients directly into storm drains, streams, and lakes, fueling algae blooms that harm aquatic life. If rain surprises you after application, don’t panic; a light shower can actually help work granular fertilizer into the soil without significant loss.
Create buffer zones between fertilized areas and any water features, whether it’s a natural stream, pond, or drainage ditch. Leave a strip of at least ten feet unfertilized along these edges, native grasses, shrubs, or groundcovers in this zone act as a filter. Riparian buffers reduce pollution by trapping sediment and absorbing excess nutrients before they reach waterways.
Apply fertilizer precisely where plants need it rather than broadcasting across entire beds. Spot-treat individual plants or rows instead of covering pathways, bare soil, or hardscapes where nutrients wash away unused. Sweep any stray granules off driveways, sidewalks, and patios back onto soil, what looks like a few specks becomes concentrated pollution once it enters storm systems.
Safety and Handling Requirements
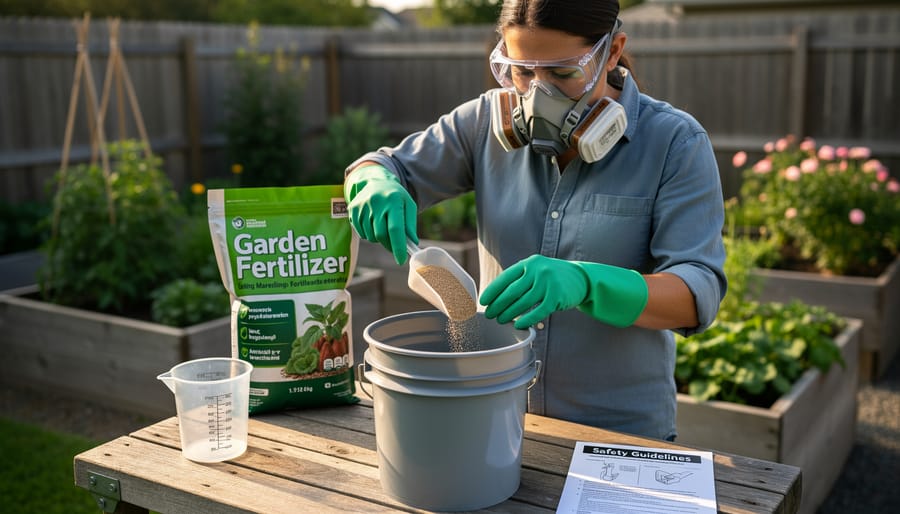
Handling fertilizers safely protects you, your family, pets, and the environment. Start by wearing appropriate protective equipment: gloves prevent skin irritation from concentrated products, safety glasses shield your eyes during mixing, and a dust mask helps when working with dry fertilizers that can produce fine particles.
Store all fertilizers in their original containers with labels intact, in a cool, dry location away from children, pets, and food. Keep them off the ground on shelves to prevent moisture damage, and never store liquid and dry products together where leaks could cause reactions.
When mixing fertilizers, always add product to water, never water to product, to prevent splashing and heat generation. Mix outdoors or in well-ventilated areas, and use dedicated measuring tools that won’t be confused with kitchen equipment. Follow label dilution rates exactly; stronger isn’t better and can harm plants.
If skin contact occurs, rinse immediately with plenty of water for at least 15 minutes. For eye exposure, flush continuously while seeking medical attention. Clean up spills promptly by sweeping dry material into containers or absorbing liquids with sand or cat litter, then disposing according to local hazardous waste guidelines.
Where to Get Help and Expert Resources
Knowing when you need help and where to find it can save you time, money, and potentially your plants. While basic fertilization is straightforward, certain situations call for expert guidance.
Start with your local university extension service, they’re funded to help gardeners like you and typically offer free or low-cost soil testing, diagnostic services, and research-based fertilization recommendations tailored to your specific region. Extension agents understand local soil conditions, climate patterns, and common plant problems in your area, making their advice particularly valuable.
Professional soil testing labs provide detailed nutrient analysis beyond basic home test kits. They’ll measure macro and micronutrients, pH, organic matter content, and sometimes even recommend specific fertilization strategies based on your results. Most labs return results within a week or two, complete with interpretation guides.
For immediate questions or troubleshooting, tap into these readily available resources:
- Cooperative Extension offices (search “[your state] extension service”) for local expertise and testing
- Independent soil testing laboratories for comprehensive nutrient analysis and fertilization plans
- Certified professional horticulturists through organizations like the American Society for Horticultural Science
- Master Gardener programs offering free consultations and workshops in most counties
- Local independent garden centers with trained staff who understand regional growing conditions
- Online communities like GardenSculpt’s forums where experienced gardeners share real-world solutions
Seek professional help when plants show persistent yellowing despite fertilization, when you’re managing a large-scale garden project, when dealing with contaminated soil, or when you simply feel overwhelmed by conflicting fertilization advice. A one-hour consultation with a certified horticulturist often costs less than replacing dead plants and provides clarity worth far more than the fee.
At-a-Glance Details
Here’s a quick reference guide showing how different fertilization methods compare in terms of speed, effort, and ideal applications. This table helps you choose the right approach for your specific garden situation.
| Fertilization Method | Results Timeline | Application Frequency | Best Used For |
|---|---|---|---|
| Granular Soil Application | 1-2 weeks | Every 6-8 weeks | Established beds, trees, shrubs |
| Foliar Feeding | 3-7 days | Every 2-3 weeks | Quick nutrient boosts, deficiency correction |
| Liquid Soil Drench | 5-10 days | Every 3-4 weeks | Container plants, intensive gardens |
| Slow-Release Granules | 2-3 weeks | Every 3-4 months | Low-maintenance landscapes, containers |
| Fertigation Systems | 1 week | Continuous or weekly | Large gardens, professional setups |
Use this comparison to match fertilization methods with your schedule and garden needs. Combining approaches throughout the growing season often delivers the best artistic results while respecting each plant’s natural rhythm.
Common Fertilization Process Questions Answered
How do I know if I’ve over-fertilized my plants?
Watch for brown or yellow leaf edges, white salt crust on the soil surface, wilting despite adequate water, or stunted new growth. If you spot these signs, flush the soil with water and hold off on feeding for several weeks.
Should I choose organic or synthetic fertilizers?
Both work well for different situations. Organic fertilizers release nutrients slowly and improve soil structure over time, making them ideal for building long-term garden health. Synthetic options provide faster nutrient availability when plants need a quick boost during peak growing periods.
What do the three numbers on fertilizer labels mean?
These numbers represent the N-P-K ratio: nitrogen for leafy growth, phosphorus for roots and flowers, and potassium for overall plant health. A 10-10-10 formula contains equal parts of each, while a 5-10-5 emphasizes flowering.
Can I fertilize during hot summer weather?
You can, but apply fertilizer in the early morning or evening when temperatures are cooler, and water thoroughly afterward. High heat combined with fertilizer can stress plant roots, so consider reducing your application rate by half during extreme temperatures.
Beyond these common concerns, timing questions come up frequently. Many gardeners wonder whether to fertilize before or after rain, light rain helps distribute nutrients, but heavy downpours wash fertilizer away before plants can use it. Wait until the forecast shows a few dry days ahead for soil applications.
Label confusion extends beyond N-P-K ratios. You’ll also see percentages for micronutrients like iron, manganese, and zinc, which matter for specific deficiency corrections. If your label says “slow-release” or “controlled-release,” expect nutrients to become available over weeks or months rather than immediately. “Complete” fertilizers contain all three primary nutrients, while “incomplete” formulas might focus on just one or two.
Switching between fertilization methods raises questions too. If you’ve been using granular fertilizers and want to try liquid feeding, you’ll need to adjust your schedule, liquids require more frequent applications but show results faster. Don’t double up by applying both at full strength simultaneously, or you’ll risk nutrient burn.
For troubleshooting yellowing leaves, consider that not all discoloration stems from nutrient deficiency. Sometimes overwatering, pests, or disease cause similar symptoms. Test your soil before adding more fertilizer, since adding nutrients to already-adequate soil creates imbalances rather than solutions.
Understanding the fertilization plant process transforms how you nurture your garden. It’s not just about following a feeding schedule, it’s about creating the conditions where plants thrive and your outdoor space becomes a living masterpiece.
Start with a soil test. This single step gives you the knowledge to fertilize with precision rather than guesswork, protecting both your plants and the environment while saving money on unnecessary products. Once you understand what your soil actually needs, you can choose the right fertilization method and timing for spectacular results.
Remember that fertilization is both science and art. The science tells you what nutrients plants need and when. The art comes in observing how your specific plants respond, adjusting your approach for different garden areas, and timing applications to support the vision you have for your landscape.
We’d love to hear about your fertilization successes and challenges in the GardenSculpt community. Share your soil test results, ask questions about specific plants, or show us the transformations you’ve achieved. Every garden tells a story, and fertilization is one of the most powerful tools in writing yours.