
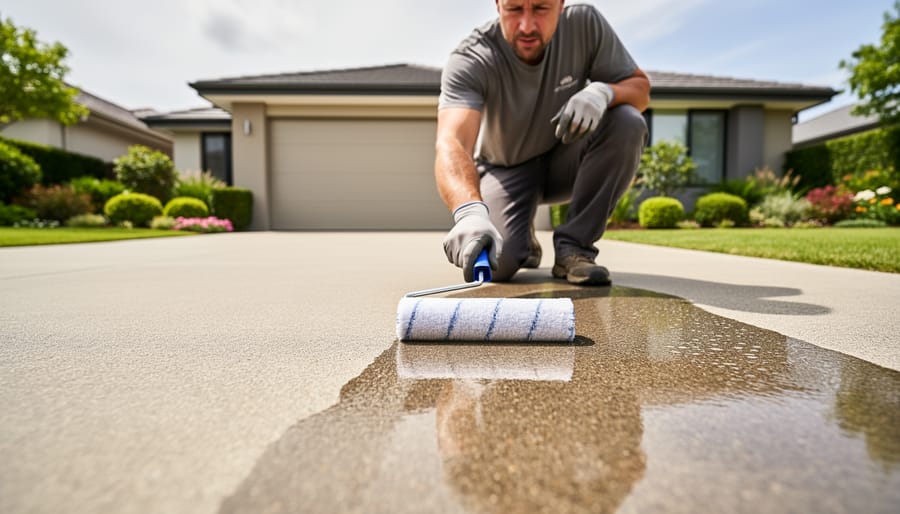
You can transform your weathered concrete driveway into a glossy, protected surface in just one weekend by applying a ceramic coating, a process that typically takes 6-8 hours of active work spread across two days. This DIY approach delivers the same long-lasting protection and deep shine you’d get from professional contractors, but at roughly a third of the cost, while giving you complete control over the application quality and finish.
Ceramic coatings create a chemical bond with concrete that repels water, oil, and stains while resisting UV damage and making future cleaning as simple as a quick rinse. For garden enthusiasts who’ve invested time perfecting their landscape, your driveway serves as the welcoming threshold to everything you’ve created. A well-maintained, gleaming surface doesn’t just protect the concrete from freeze-thaw cycles and de-icing salts, it frames your garden beds and hardscaping with the same intentionality you bring to choosing perennials or placing focal point sculptures.
The timing couldn’t be better to tackle this project now. You need two consecutive dry days with temperatures between 50-85°F and humidity below 70%, conditions that are ideal for proper curing. The process requires minimal specialized tools, most of which you likely already own or can rent affordably at your local hardware store.
This guide walks you through every stage, from properly preparing the concrete surface to applying multiple coats and verifying your coverage, plus troubleshooting common issues like streaking or uneven gloss. Whether you’re amplifying existing curb appeal ideas or starting fresh with your outdoor aesthetic, a professional ceramic coating creates cohesion across your entire property.
Why Ceramic Coating Transforms Your Driveway
Ceramic coating creates a chemical bond with your driveway’s surface, forming a protective shield that lasts between five and ten years. That’s significantly longer than traditional sealers, which typically require reapplication every one to two years. This durability translates to real cost savings over time, even though the initial ceramic coating product costs more than conventional options.
The protective barrier actively repels oil, grease, and common automotive fluids that normally penetrate and stain concrete or asphalt. Instead of soaking in, these substances bead up on the surface where you can wipe them away with minimal effort. UV rays, which gradually fade and degrade untreated driveways, can’t penetrate the coating either, keeping your driveway looking newer for longer.
Weather resistance is where ceramic coating really shines. Rain, snow, freeze-thaw cycles, and summer heat all take their toll on exposed concrete and asphalt, causing surface deterioration and cracking. The coating acts as a barrier against moisture penetration and temperature extremes, slowing this degradation considerably.
Beyond protection, there’s the visual impact. A properly applied ceramic coating creates a rich, glossy finish that transforms a dull, porous surface into something that looks almost wet. This enhanced appearance doesn’t just make your driveway look better in isolation; it elevates your entire front yard aesthetic. When your driveway gleams, it frames your garden beds, walkways, and landscaping features with a polished edge that ties everything together.
Professional ceramic coating application typically costs two to four dollars per square foot. Doing it yourself drops that to around one dollar per square foot, maybe less depending on the product you choose. For an average two-car driveway, you’re looking at savings of several hundred dollars while achieving comparable results.
What You’ll Need: Tools and Materials
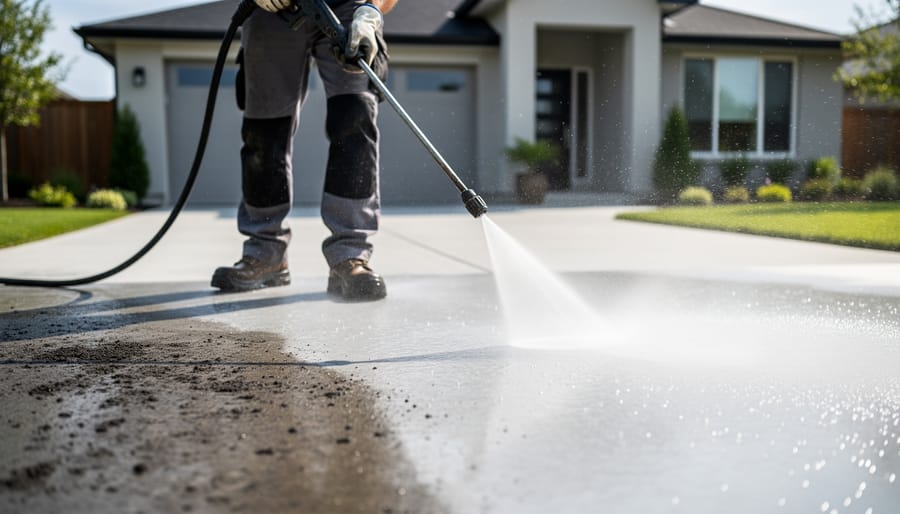
Gathering the right supplies before you start saves frustrating mid-project trips to the hardware store and ensures you can work efficiently through the weekend. The good news is that most of what you need is readily available at home improvement stores, and the investment is far less than hiring a professional to do the work.
Your materials list breaks down into four main categories: cleaning supplies, coating products, application tools, and safety gear. For cleaning, you’ll need a pressure washer (2000-3000 PSI works best), a concrete or asphalt-specific degreaser, and if your driveway is new or very smooth concrete, an etching solution. The pressure washer doesn’t have to be professional-grade, a rental for the weekend runs about $50-75 if you don’t own one.
The star of the show is your ceramic coating product itself. Look for formulas specifically designed for driveways and large concrete or asphalt surfaces, not automotive ceramic coatings, which are formulated differently. Quality driveway ceramic coatings from brands like Simoniz, Rust-Oleum, or specialized concrete sealers typically come in one or two-gallon containers. Check the coverage rate on the label, most products cover 200-400 square feet per gallon, so measure your driveway first to buy enough. For a standard two-car driveway (about 600 square feet), plan on two to three gallons.
Here’s your complete shopping list:
- Pressure washer (2000-3000 PSI) or rental
- Concrete/asphalt degreaser and cleaner
- Etching solution (for concrete only, if needed)
- Ceramic coating product (calculate based on your driveway square footage)
- Microfiber applicator pads or paint roller with extension pole
- Paint tray if using rollers
- Chemical-resistant gloves (nitrile or neoprene)
- Safety glasses or goggles
- Respirator mask (especially important in enclosed or semi-enclosed areas)
- Concrete crack filler and patching compound (if repairs needed)
- Putty knife or trowel for repairs
- Garden hose with spray nozzle
- Stiff-bristle brush for stubborn stains
- Painter’s tape and plastic sheeting to protect adjacent surfaces
When selecting your ceramic coating, read the technical specs carefully. Some products require a primer coat, while others are single-application systems. Temperature range matters too, most coatings need ambient temperatures between 50-90°F during application and initial curing. If your driveway has existing stains or you’ve never sealed it before, choose a product with higher solids content (40% or more) for better coverage and durability.
Safety First: Precautions and Prep Work
Before you crack open that ceramic coating container, take a few minutes to set yourself up for a safe, successful project. Ceramic coatings contain chemical compounds that demand respect and proper handling, rushing this prep work can lead to health issues or a ruined application.
Start with your personal protective equipment. You’ll need chemical-resistant gloves (nitrile works well), safety glasses or goggles to protect against splashes, and long sleeves to minimize skin exposure. If you’re working in an enclosed area like a garage, add a respirator rated for organic vapors to your kit. The fumes won’t knock you over instantly, but prolonged exposure in poor ventilation can cause headaches, dizziness, and respiratory irritation.
Check your weather forecast carefully before starting. You need a minimum 48-hour window with no rain, ideally 72 hours for full cure. Morning dew counts as moisture, so plan accordingly. Measure your driveway surface temperature with an infrared thermometer or simply touch it, if it feels hot to your hand, it’s too warm for application.
Keep children and pets completely away from the work area during application and for the full curing period. The coating remains toxic until fully cured, and curious hands or paws can leave permanent prints in your careful work.
If coating contacts your skin, rinse immediately with soap and water for at least 15 minutes. For eye contact, flush continuously with water and seek medical attention. Keep the product’s safety data sheet handy throughout the project.
Stop conditions that mean you shouldn’t start: temperatures outside the 50-85°F range, rain in the forecast within 48 hours, wind speeds above 10 mph (which blows dust onto wet coating), or any existing moisture on the driveway surface. Patience now prevents do-overs later.
Step-by-Step: Applying Ceramic Coating to Your Driveway
Step 1: Clean and Prepare the Surface
Before any coating touches your driveway, you need a spotless canvas. Think of this as preparing a wall for paint, skip the prep, and the finish suffers.
Start with a thorough inspection. Walk your entire driveway looking for stains, especially oil spots that create invisible barriers preventing coating adhesion. Mark these problem areas with chalk so you don’t miss them during cleaning.
Sweep away all loose debris, leaves, and dirt. Now grab your pressure washer and work methodically in overlapping passes, holding the nozzle about 12 inches from the surface. Use at least 3000 PSI for concrete driveways, slightly less for asphalt to avoid surface damage.
For stubborn oil stains, apply a concrete degreaser directly to the spots and let it sit for 15-20 minutes before pressure washing. You may need to repeat this process two or three times for old, set-in stains. A wire brush helps work the degreaser into porous concrete.
After pressure washing, apply a concrete cleaner across the entire driveway. This removes residual oils, dirt, and any efflorescence (that white, chalky buildup). Scrub with a stiff push broom, then rinse thoroughly.
Here’s the crucial part: your driveway must be completely dry before coating. Depending on weather and humidity, this takes 24-48 hours. Touch the surface, if it feels even slightly cool or damp, wait longer. Moisture trapped under coating causes peeling and failure.
Step 2: Repair Cracks and Imperfections
Before coating, walk your driveway and mark every crack, hole, or damaged spot with chalk. Hairline cracks under 1/8 inch can be filled with liquid crack filler, which flows into tiny gaps. For wider cracks up to 1/2 inch, use a concrete or asphalt crack filler that comes in a caulk tube. Cut the tube tip at an angle, push the nozzle deep into the crack, and fill from the bottom up to prevent air pockets.
Holes and divots need patching compound. Clean out loose debris first, dampen the area slightly, then pack the compound firmly with a trowel. Overfill slightly since most products shrink as they cure. Smooth the surface flush with surrounding concrete or asphalt.
Here’s the critical part: let repairs cure completely before coating. Most products need 24-48 hours, but check your specific product label. Coating over wet or uncured repairs causes adhesion failure and wasted effort.
If you find structural damage, major settling cracks wider than 1/2 inch, large sunken sections, or extensive surface deterioration, call a concrete professional. Ceramic coating enhances and protects your driveway but can’t fix serious underlying problems.
Step 3: Etch the Surface (If Required)
Etching creates a slightly rough texture that helps ceramic coating bond properly to your driveway. You’ll need this step if your concrete is brand new (less than 28 days cured), extremely smooth, or previously sealed. Older, weathered concrete usually has enough natural porosity to skip this step.
To test if you need etching, splash a small amount of water on the surface. If it soaks in within 30 seconds, you’re good to go. If water beads up and sits on top, you’ll need to etch.
Mix your etching solution following the manufacturer’s ratio, typically one part acid to three parts water. Always add acid to water, never the reverse, to avoid dangerous splashing. Work in sections, applying the solution with a watering can or pump sprayer. You’ll see fizzing and bubbling as it works. Let it sit for 10-15 minutes, scrub with a stiff brush, then rinse thoroughly with your pressure washer until the water runs clear and no residue remains.
The surface should feel slightly rough, like 80-grit sandpaper, when dry.
Step 4: Apply the First Coat
Now comes the moment you’ve been preparing for all weekend. Before you open that coating container, double-check the temperature, most products work best between 50°F and 85°F, and your surface should feel cool to the touch, not sun-baked. Work during morning or evening hours to avoid direct sunlight, which can cause the coating to flash-dry and leave streaks.
Pour a small amount of ceramic coating into a paint tray, never work directly from the original container, as contamination can ruin unused product. Start at the section farthest from your garage or exit point so you won’t trap yourself. Most driveways require working in 4-foot by 4-foot sections to maintain control and ensure even coverage.
- Dip your microfiber applicator pad or short-nap roller into the coating, removing excess against the tray edge, you want it saturated but not dripping.
- Apply the coating in overlapping straight lines across your marked section, using consistent pressure and speed throughout each pass.
- Immediately cross-hatch over the same area at a 90-degree angle to ensure complete coverage and eliminate any directional streaking.
- Blend the edges into the next section while they’re still wet, waiting even five minutes can create visible lap marks that won’t disappear.
- Move to the adjacent section and repeat, always keeping a wet edge where sections meet.
Watch for pooling in low spots or textured areas. If coating puddles, work it outward with your applicator before it sets. Thin spots look lighter or duller than properly coated areas, catch these immediately and add more product. Most ceramic coatings cover 150-250 square feet per quart, but porous surfaces drink more. You’ll develop a rhythm after the first few sections, steady, deliberate strokes beat rushing every time.
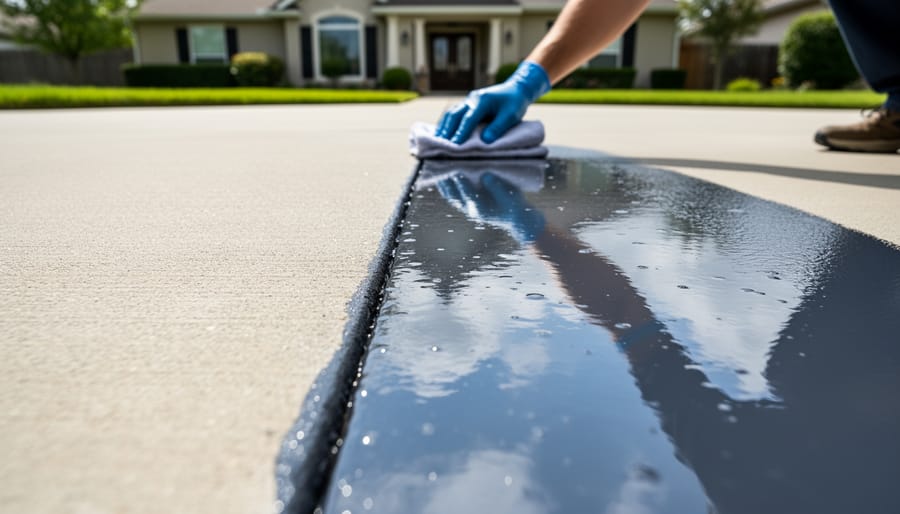
Step 5: Apply Additional Coats
Most ceramic coatings require at least two coats for optimal protection, and some driveways benefit from a third layer in high-traffic areas. The key is patience between applications.
Wait 2-4 hours between coats, or follow your product’s specific instructions. The first coat should feel dry to a light touch but doesn’t need to be fully cured. Test readiness by gently pressing a clean finger on an inconspicuous spot, if it leaves no mark and feels tacky rather than wet, you’re good to proceed.
Apply the second coat using the same technique as the first, working in consistent sections. You’ll notice this layer goes on more smoothly since you’re coating over the sealed first layer rather than raw concrete. Maintain the same thin, even coverage, resist the urge to apply thick coats thinking more is better.
For driveways that see heavy vehicle traffic or harsh winters, consider a third coat focused on the tire tracks and turnaround areas. This builds extra protection where you need it most.
Between each coat, keep the surface clean and protected from debris, leaves, or curious pets that might leave prints in your work.
Step 6: Allow Proper Curing Time
After applying your final coat, resist the urge to test your handiwork by walking on it right away. Ceramic coatings need proper curing time to achieve their full protective potential, and rushing this step can ruin an otherwise perfect application.
Most ceramic driveway coatings allow light foot traffic after 24 hours, but you’ll need to keep vehicles off the surface for at least 72 hours, many manufacturers recommend waiting a full week before driving on it. Check your specific product instructions, as curing times vary based on formulation, temperature, and humidity.
During the curing period, your coating is vulnerable to moisture. If rain threatens within the first 24-48 hours, cover the driveway with plastic sheeting secured at the edges. Don’t let the plastic touch the wet coating, use boards or buckets to tent it slightly above the surface.
A properly cured coating develops a hard, glass-like finish. You’ll notice a consistent glossy sheen across the entire surface, and water will bead up and roll off rather than spreading out. If you see cloudy patches or sticky spots after the recommended cure time, the coating may need additional time or might require troubleshooting.
How to Tell If You’ve Done It Right
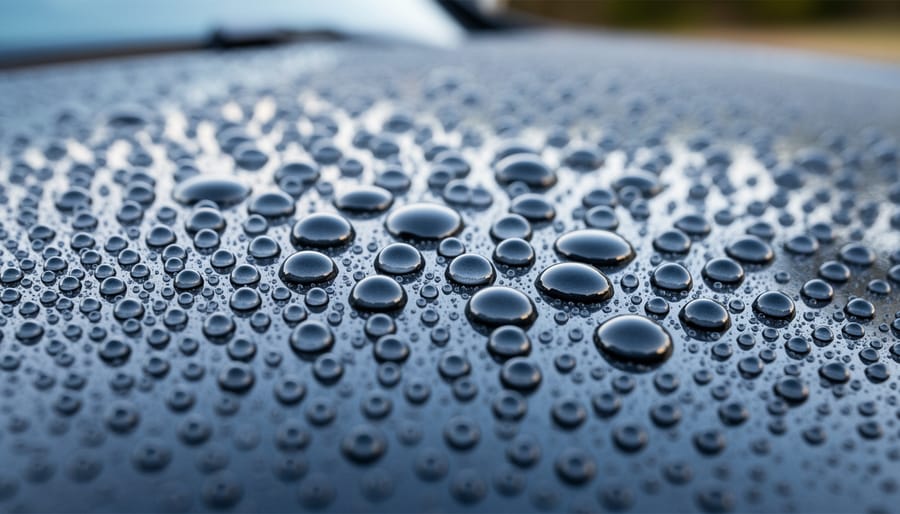
After all your hard work, you’ll want to confirm that your ceramic coating has bonded properly and will deliver the protection you expect. The good news is that several simple tests can show you whether you’ve achieved professional-quality results.
Visual Inspection
Start by examining your driveway in natural daylight from multiple angles. A successful application should show an even, glossy finish across the entire surface with consistent color depth. Look closely for any streaks, splotchy areas, or spots where you can see a difference in sheen. The coating should appear uniform without cloudy patches or areas that look dull compared to the rest. Walk the entire driveway and check edges carefully, as these spots often get missed or receive thinner coverage.
The Water Beading Test
Once the coating has cured for at least 24 hours, spray a section of your driveway with water from a garden hose. Properly bonded ceramic coating will cause water to bead up into tight droplets that roll off the surface rather than spreading out. This hydrophobic effect is your best confirmation that the coating has chemically bonded to the concrete or asphalt.
Touch and Texture Check
Run your hand across the cured coating (wearing a clean glove works best). The surface should feel incredibly smooth and slick, almost like glass. Any rough patches, sticky spots, or areas that feel different from the rest indicate application problems. The coating should be completely hard to the touch with no tackiness.
Troubleshooting Common Issues
If you notice cloudiness or haziness, it usually means the coating was applied too thick in those areas or moisture was present during application. Streaks typically result from uneven spreading or not maintaining wet edges between sections. For minor imperfections affecting less than 10% of the surface, you can apply a thin touch-up coat to those specific areas after light sanding. However, if you see widespread problems like poor water beading across more than a quarter of the driveway, significant cloudiness, or the coating peeling or flaking, it’s better to strip the coating chemically and start fresh rather than trying to patch extensively.
Maintenance Tips for Long-Lasting Results
Your weekend effort deserves care that keeps it looking sharp for years. Rinse the driveway every two weeks with a garden hose to remove dirt and debris, ceramic coating sheds grime easily, so a simple spray does most of the work. For stubborn spots, use pH-neutral car wash soap and a soft brush; skip harsh degreasers or acidic cleaners that can degrade the protective layer over time.
Here’s your quick-reference guide for coating care:
- Do rinse regularly with plain water to prevent buildup
- Do use pH-neutral cleaners for occasional deep cleaning
- Don’t use abrasive brushes or pressure washers above 1500 PSI
- Don’t apply wax, sealants, or other coatings over ceramic
- Do inspect quarterly for signs of wear in high-traffic areas
Most ceramic coatings last seven to ten years with proper care, but you’ll likely need a light touch-up coat around the five-year mark where tires turn frequently. Just like seasonal driveway care matters for your outdoor space, similar to how you’d adjust watering tips or consider soil basics throughout the year, watch for winter salt accumulation and rinse it off promptly to prevent surface etching. This small investment of time protects your weekend project and keeps your driveway contributing to that polished garden aesthetic you’ve worked to create.
Common Questions About DIY Ceramic Coating
How much does DIY ceramic coating cost compared to hiring a professional?
Expect to spend $200-400 on materials for a typical two-car driveway, versus $1,500-3,000 for professional application. You’re essentially trading a weekend of your time for significant savings while gaining valuable experience for future projects.
Can I apply ceramic coating in any weather?
Ideal conditions are 50-85°F with low humidity and no rain in the 48-hour forecast. Avoid applying in direct hot sunlight, during high winds that can blow debris onto wet coating, or when overnight temperatures will drop below 40°F during the curing period.
What if I miss a spot or create streaks?
Caught immediately, you can reapply product to blend the area. Once partially cured, you’ll need to wait until fully cured (typically 72 hours), then lightly sand the problem area and apply a fresh coat to that section.
How long will the coating actually last?
Quality ceramic coatings last 5-7 years with proper maintenance, sometimes reaching 10 years on driveways with light use. Your results depend on traffic levels, climate exposure, and how consistently you clean the surface.
Do I really need to etch new concrete before coating?
Yes, new concrete has a smooth surface that prevents proper bonding. Etching opens the pores for mechanical adhesion, ensuring your coating won’t peel or flake off prematurely.
These questions come up repeatedly in our community forum, especially from gardeners tackling their first hardscape project. Many readers who complete their driveway coating in fall find they’re inspired to continue improving their outdoor spaces, often returning for a spring outdoor refresh that builds on their newfound confidence. The skills you develop during this weekend project transfer beautifully to other concrete surfaces around your garden, from walkways to patio edges.
Congratulations! You’ve just completed a professional-grade driveway transformation in a single weekend. That glossy, protected surface isn’t just functional, it’s now a stunning canvas that sets the tone for your entire outdoor space. Every time you pull in, you’ll appreciate how this project elevated your home’s curb appeal and created a polished foundation for your garden’s visual story.
Your newly coated driveway will protect itself for years while requiring minimal maintenance, giving you more time to focus on the creative gardening projects you love. The clean lines and reflective finish complement your landscape design, proving that practical improvements can also be artistic statements.
We’d love to see your results! Head over to the GardenSculpt community forum to share photos of your transformed driveway and inspire fellow garden enthusiasts tackling their own weekend projects. Your experience and tips could be exactly what someone else needs to take the leap.
Remember, creating beautiful outdoor spaces is about more than just plants and paths. Every element, from your driveway to your garden sculptures, contributes to the living art you’re cultivating. You’ve taken another meaningful step in that journey this weekend.