
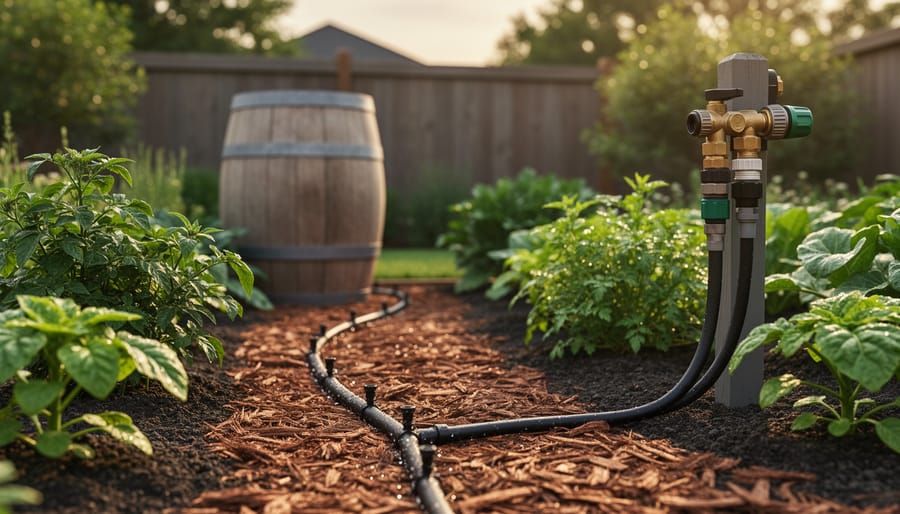
Finding local water management solutions for your garden starts with three essential steps: contacting your municipal water utility to learn about restrictions and rebate programs, visiting nearby garden centers and irrigation suppliers for region-appropriate equipment, and reaching out to your county extension office for climate-specific conservation advice. Most gardeners can gather these resources within a week and begin implementing smart water management strategies immediately, often reducing water bills by 30 to 50 percent while growing healthier plants.
Your zip code determines more than you might think when it comes to garden watering. Local rainfall patterns, soil types, and municipal regulations create a unique water landscape that generic online advice simply can’t address. A drip irrigation system perfect for sandy Arizona soil won’t perform the same way in Georgia clay, and what works during California’s dry season may be overkill in the Pacific Northwest’s rainy months.
The good news? Your community already has the expertise and resources you need, often at little or no cost. Water utilities want to help you conserve because it benefits their infrastructure. Local nurseries stock plants and systems proven to thrive in your specific conditions. Extension agents offer free consultations based on decades of regional research.
This guide walks you through building your personalized water management system using the resources right in your neighborhood. You’ll learn exactly where to go, what questions to ask, and how to piece together solutions that respect both your garden’s needs and your community’s water future.
Understanding Your Local Water Management Needs
Finding Local Climate and Rainfall Data
Your first step is finding accurate data about your area’s typical rainfall and climate patterns. Start with your county’s Cooperative Extension office, search “[your county name] cooperative extension” to locate yours. Extension agents provide free, region-specific information about growing seasons, average precipitation, and historical drought data that directly affects gardening decisions.
The National Weather Service website () lets you enter your zip code to access local weather station records, including monthly rainfall averages and severe weather alerts. Many municipal water districts also publish annual water reports showing seasonal supply levels and conservation targets, search “[your city name] water district annual report” to find these.
For hands-on measurements, install a simple rain gauge in an open area of your garden. Track weekly rainfall for at least one season to compare against regional averages. This data helps you calculate how much supplemental watering your garden truly needs. Understanding these patterns influences everything from plant selection to soil water retention strategies, making your water management efforts far more effective and cost-efficient year-round.
Checking Municipal Water Restrictions Near You
Start by visiting your local water utility’s website, simply search “[your city name] water department” to find their homepage. Most utilities post current watering restrictions front and center, especially during summer months or drought periods. You’ll typically find allowed watering days, permitted hours (often early morning or evening), and any temporary bans on specific activities like lawn watering or car washing.
Look for a “Conservation” or “Rebates” section on the site. Many municipalities offer cash incentives for installing drip irrigation, upgrading to smart controllers, or replacing turf with drought-tolerant plants. These rebates can offset 30-50% of your equipment costs in 2026.
Can’t find what you need online? Call your water utility directly. Staff can explain current restrictions, upcoming conservation mandates, and available rebate programs. Ask specifically about pre-approval requirements for rebates, some programs need documentation before you purchase equipment.
Also check if your area has tiered water pricing. Understanding how rates increase with usage helps you calculate potential savings from efficient irrigation. Some utilities provide free water audits where professionals assess your garden and recommend conservation measures tailored to local conditions.
Tools and Materials You’ll Need
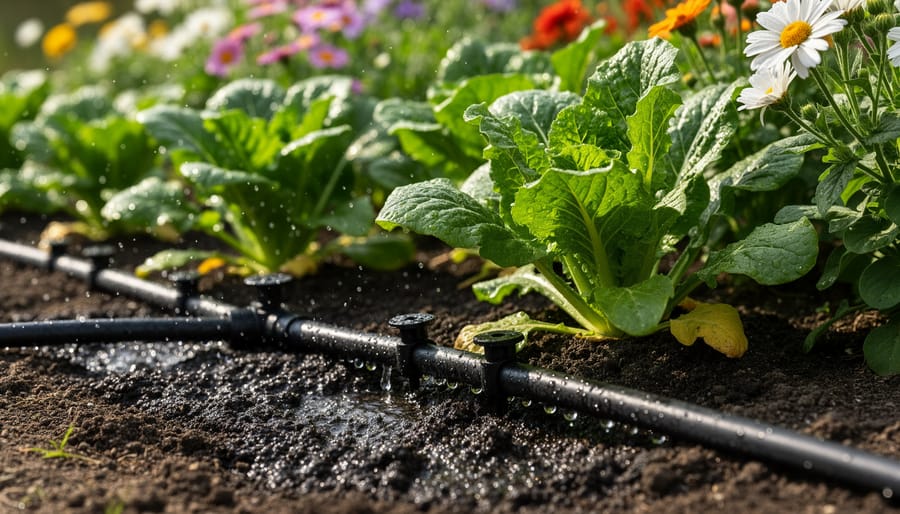
Setting up a water-smart garden requires basic tools you probably already own plus a few specialized irrigation components. The good news: most items are available at local garden centers and hardware stores, where staff can help you select parts compatible with your area’s water pressure and climate conditions.
Essential Tools and Materials:
- Digging and installation tools: shovel, garden rake, trenching spade, utility knife, measuring tape, and marking flags
- Irrigation system components: main supply line (½” or ¾” tubing), drip emitters or soaker hoses, pressure regulator, filter, hose-thread timer, connectors and end caps
- Water collection and storage: rain barrel (50-75 gallons), overflow hose, mosquito screen, spigot kit
- Testing and monitoring equipment: soil moisture meter, rain gauge, bucket and stopwatch for measuring flow rates
- Conservation materials: 2-3 cubic yards of organic mulch, compost for soil amendment, stakes for securing lines
Budget planning for 2026 depends on your garden size and chosen method. A basic drip system for a 200-square-foot bed runs $75-150 if you buy components locally and install yourself. Add $40-80 for a hose-thread timer, $80-200 for a quality rain barrel, and $15-35 for testing tools. Expect to spend $250-500 total for a modest setup, or $600-1,200 for a comprehensive system covering multiple zones with smart controllers.
Local garden centers carry reliable brands and let you return incompatible fittings easily, while online retailers offer broader selection and sometimes lower prices on bulk items like drip tape. Consider buying technical components locally first, staff expertise helps avoid costly mistakes, then shop online for mulch, stakes, and other generic supplies once you know exactly what you need.
Safety Warnings and Precautions
Before you start digging trenches or connecting pipes, take time to address these critical safety concerns. Skipping these steps can lead to serious injuries, legal problems, or expensive damage to your property and community infrastructure.
Contact your city or county building department to learn what permits you need for irrigation system installation. Some areas require permits for systems connecting to municipal water, while others only regulate automatic sprinklers or pumps. Ask about backflow prevention requirements specific to your municipality, most jurisdictions mandate certified devices to prevent garden water from flowing back into drinking water lines. You’ll likely need a licensed plumber to install and test these devices annually.
When working with drip and timers keep electrical components away from water sources. Use outdoor-rated timers and GFCI-protected outlets for pumps and controllers. Never splice wiring underground without proper waterproof connectors and conduit.
If you’re amending soil for drainage or creating berms, watch for unstable slopes that could shift during heavy rain. Avoid placing rain barrels where they could tip onto walkways or crush plants when full, a 50-gallon barrel weighs over 400 pounds. Secure all elevated water storage with proper strapping or stable platforms.
Step-by-Step: Installing a Water-Smart Garden System
Step 1: Map Your Garden’s Water Zones
Walk through your garden on a typical sunny afternoon and observe where water pools, which areas dry out fastest, and how sunlight moves across the space. Grab a notebook and sketch a rough overhead view of your garden beds, lawn areas, and hardscaping.
Now divide this sketch into zones based on water needs. Group thirsty vegetables and annuals together, they’ll form your high-water zone. Established shrubs and drought-tolerant perennials belong in a separate moderate-water zone. Native plants and succulents that thrive on rainfall alone create your low-water zone.
Mark shaded areas with diagonal lines and sunny spots with dots. Note where soil stays moist versus sandy patches that drain quickly. This visual map shows exactly where you’ll need more frequent watering points versus fewer emitters.
Your sketch doesn’t need artistic polish, just clear enough that you can plan irrigation line placement. Photograph it on your phone so you have it handy when shopping for supplies at local garden centers.
Step 2: Choose Your Water Management Method
Your garden’s unique conditions determine which water management method works best. Start by matching the approach to your space: drip irrigation excels in large vegetable gardens or densely planted beds, delivering water directly to roots with minimal waste. Soaker hoses offer a simpler, lower-cost option for smaller gardens or raised beds, though they work best on level ground.
Rain barrels make sense if your local water costs run high or restrictions limit outdoor watering. A single barrel captures 600+ gallons annually in moderate rainfall zones, enough for container gardens or supplemental watering. Check your municipal utility’s website, many offer rebates that cut the upfront cost significantly.
Smart controllers justify their higher price when you’re managing multiple zones or traveling frequently. These devices adjust watering based on real-time weather data from your area, preventing waste during rainy periods. Calculate your potential savings: if you currently spend $40+ monthly on outdoor water during summer, a $150 controller pays for itself in one season.
Combine methods for best results. Pair drip lines with a rain barrel for vegetable beds, or add a smart controller to existing soaker hoses.
Step 3: Source Materials from Local Suppliers
Start by searching “irrigation supplies near me” and “garden centers [your city]” to create a list of potential suppliers within a 10-15 mile radius. Big-box hardware stores like Home Depot or Lowe’s stock basic drip components, but dedicated irrigation suppliers and independent garden centers often carry a wider selection and employ staff with hands-on installation experience.
When you visit, bring your garden sketch and ask specific questions: What’s the typical water pressure in your area? Which emitter flow rates work best with local soil types? Do they stock replacement parts year-round? Staff at local shops can recommend products that actually perform in your climate, invaluable insight you won’t get from online listings.
Buying locally means you can return incompatible fittings immediately instead of waiting for shipping, and many shops offer free design consultations or loaner tools. Ask about bulk discounts if you’re tackling a large space, and whether they provide warranty support for timers and controllers. Local suppliers become partners in your project, not just vendors.
Step 4: Install Your Irrigation System
Start at the water source, typically an outdoor spigot or the outlet of your rain barrel. Attach a backflow preventer (required by most municipalities), then connect a pressure regulator to keep water flow at 20-30 PSI, which prevents emitter blowouts and ensures even distribution. Thread on a filter to catch sediment that could clog emitters, then attach your main supply line.
Lay the main line along the primary path through your garden bed, securing it with landscape staples every 3-4 feet to prevent shifting. From this main line, branch off with smaller distribution tubing to reach individual plants or rows. The installation substeps follow this sequence:
- Cut the main line where you need a branch, insert a barbed tee or elbow fitting, and push the distribution tubing firmly onto the barb until secure.
- Position emitters directly at the root zone of each plant, 6-12 inches from the stem for established plants, closer for seedlings, and punch holes in the tubing with the provided punch tool.
- Press emitters into the holes with a slight twist; they should sit snugly without leaking, and you can test the seal by gently tugging.
- Cap the end of each line with a flush valve or figure-eight closure, leaving flush valves accessible for periodic cleaning.
- Turn on the water slowly and walk the entire system, checking every connection and emitter for leaks or misalignment, tightening fittings as needed.
Flush the system by opening all end caps and running water for two minutes to clear debris, then close the caps and let the system run for 15 minutes while you observe water distribution. Adjust emitter placement if you see dry spots or pooling, this initial check saves replanting later and ensures your zones receive the hydration you mapped in Step 1.
Step 5: Set Up Timers and Smart Controllers
Once your system is physically installed, programming it correctly makes the difference between efficient watering and wasted water. Start by setting your timer to water in the early morning (between 4 and 8 AM), when evaporation is lowest and water pressure is typically highest in your area.
Basic timers work for consistent schedules, but smart controllers save significantly more water by adjusting to actual conditions. These connect to local weather data via WiFi, automatically skipping watering when rain is forecast or has recently occurred. Models like Rachio or Rain Bird’s smart controllers pull weather information specific to your zip code, so they respond to your neighborhood’s conditions, not generalized regional data.
Install a rain sensor even if you’re using a basic timer, it’s inexpensive insurance that stops irrigation during storms. Mount it in an open area away from roof overhangs for accurate readings.
Program different zones to run sequentially rather than simultaneously, preventing pressure drops that affect coverage. Adjust run times seasonally: reduce by 30-50% in fall and spring when plants need less water and temperatures cool.
Step 6: Add Water Conservation Features
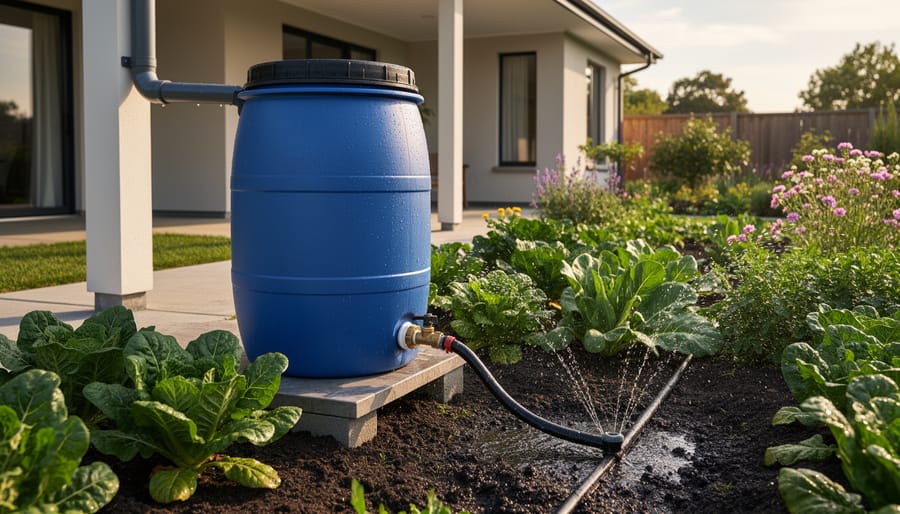
Once your irrigation is running, layer in features that help you use less water overall. Start with rain barrels, connect them to downspouts at your home or shed to capture free water for hand-watering container plants and filling drip systems during dry spells. Most garden centers near you stock 50-100 gallon barrels with spigots ready to install; just elevate them on cinder blocks for gravity flow.
Next, improve your soil’s ability to hold moisture. Work compost or aged manure into planting beds each spring; organic matter acts like a sponge, reducing how often you need to irrigate. Apply a three-inch layer of shredded bark, wood chips, or straw around plants to slow evaporation and keep roots cooler, you’ll find bulk mulch at local landscape suppliers, often cheaper than bagged.
For sloped gardens, consider simple swales (shallow trenches along the contour) or berms (low earthen ridges) that slow runoff and let water soak in where plants need it. These earth-shaping techniques cost nothing but time and match your yard’s natural drainage patterns.
Testing and Verifying Your Water Management System
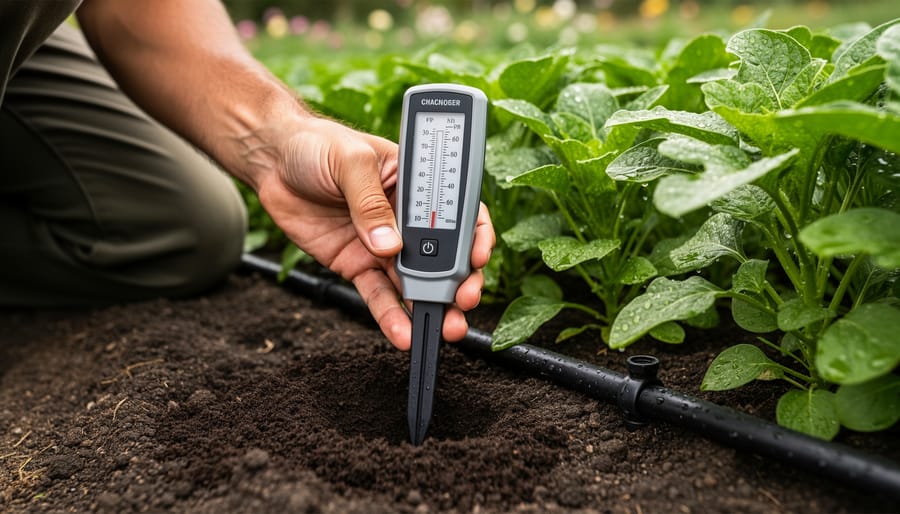
Once your water management system is running, you’ll want to confirm it’s actually doing its job before the season gets underway. Start with a basic leak inspection: turn on each zone and walk the entire line, looking for puddles, spraying joints, or wet spots where water’s escaping instead of reaching your plants. Check emitter connections, valve seats, and any splice points, these are the usual culprits. If you spot a leak, shut off the water, tighten fittings, or replace damaged components before continuing.
Next, assess how evenly water is distributed across each zone. Place several small containers (tuna cans or measuring cups work perfectly) at different points along your irrigation lines and run the system for fifteen minutes. Measure the water collected in each container; they should be roughly equal. If one area gets significantly more or less water, adjust emitter placement or flow rates to balance things out.
Run through this verification checklist to catch issues early:
- Inspect all connection points, valves, and emitters for drips or sprays
- Measure water distribution using containers placed throughout each zone
- Test soil moisture six to eight inches deep in multiple spots using a probe or screwdriver
- Check plant foliage for signs of stress, wilting, or overly saturated soil
Soil moisture testing tells you whether water’s actually penetrating where roots need it. Push a long screwdriver or moisture probe into the ground around plants in different zones; it should slide in easily if the soil is properly moist. If it hits hard, dry soil before reaching six inches, increase watering duration or frequency.
Finally, watch your plants themselves. Healthy foliage, steady growth, and vibrant color indicate your system is working. Wilting, yellowing leaves, or stunted growth might mean adjustments are needed. Plan to repeat these checks monthly during peak growing season and quarterly during slower periods, adapting your approach with seasonal watering tips as weather patterns shift throughout the year.
Connecting with Local Water Management Resources
Your local community offers valuable water management support that can save you money and improve your garden’s efficiency. Start with your county cooperative extension office, these government-funded resources provide free, region-specific advice tailored to your exact climate and soil conditions. Extension agents can recommend drought-tolerant plants that thrive in your area and connect you with master gardener programs offering hands-on workshops and irrigation clinics.
Contact your water utility or district directly to discover rebate programs for water-efficient equipment. Many municipalities offer incentives for installing drip irrigation, smart controllers, and rain barrels, sometimes covering 50-75% of costs. Ask about free water audits where experts evaluate your current system and suggest improvements. Some districts even provide discounted or free equipment like rain sensors and soil moisture meters to customers committed to conservation.
How do I find a local irrigation specialist to review my system?
Contact your cooperative extension office or water district for referrals to certified irrigation auditors. Many utilities maintain lists of qualified professionals, and some offer free or subsidized audit programs for residential customers.
What rebates are available for water-saving garden equipment?
Rebate programs vary by location, but commonly include incentives for smart irrigation controllers, drip systems, rain barrels, and high-efficiency nozzles. Check your water utility’s website or call their conservation department to learn about current offers in your area.
Can I get a professional water audit for free?
Many water districts offer complimentary residential water audits, especially in drought-prone regions. Contact your local utility to schedule an assessment, auditors will evaluate your irrigation system, identify leaks, and provide customized recommendations for your garden.
Search for local master gardener groups through your extension office or online, these volunteers host regular meetings, garden tours, and seasonal workshops where you can learn irrigation techniques specific to your region. Join online community groups focused on gardening in your city or county, where experienced locals share supplier recommendations, discuss water restrictions, and troubleshoot common challenges. Attending a single workshop or scheduling one water audit can provide personalized guidance worth hundreds of dollars while connecting you with neighbors solving the same water management puzzles you face.
Next Steps and Ongoing Maintenance
Once your water management system is running, a simple monthly walk-through keeps it performing at its best. Check for clogged emitters, kinked lines, or leaks, these small issues catch up fast if ignored. Run each zone briefly and watch for uneven spray patterns or dry spots that signal a need for adjustment.
As seasons shift, so should your watering schedule. Dial back frequency in spring and fall when cooler temperatures reduce evaporation. In summer’s peak heat, you might extend run times slightly, especially for new plantings. Most smart controllers handle this automatically, but manual timers need your input. Mark your calendar for a seasonal check-in to review and tweak.
If you garden where winters freeze, winterize before the first hard frost. Drain all lines, disconnect hoses, bring rain barrel spigots indoors, and shut off outdoor water sources. Skipping this risks burst pipes and cracked fittings that cost more to replace than the five minutes of prep.
Track your water bills over time to see real savings. Many gardeners notice a 30-50% drop after implementing efficient irrigation, especially when paired with mulching and soil improvements. Those numbers make the initial effort worthwhile.
Consider upgrades as your garden matures: adding zones for new beds, swapping standard timers for weather-based controllers, or expanding rain catchment capacity. Share your progress, challenges, and creative solutions with the GardenSculpt community, your local insights help fellow gardeners nearby make smarter water choices too.
Effective water management in your garden is never one-size-fits-all. Your local climate, soil conditions, water regulations, and available suppliers shape every decision you make, from choosing drip irrigation over soaker hoses to timing your watering schedule around regional rainfall patterns. That’s exactly why the “near me” part of your search matters so much.
You don’t need to transform your entire garden overnight. Start with one trouble zone or pick a single method that addresses your biggest water challenge. Install a rain barrel, convert one bed to drip irrigation, or simply improve your soil in a small area. As you see results, lower water bills, healthier plants, less time wrestling with hoses, you’ll gain confidence to expand your system.
The beauty of smart water management goes beyond conservation. You’re creating a resilient, thriving garden that reflects both your creativity and your commitment to sustainability.
We’d love to see what you’ve built. Share your water-saving setups, before-and-after photos, or artistic garden transformations with the GardenSculpt community. Your local solutions might inspire someone facing similar challenges in their own neighborhood. What water management method worked best in your area?