
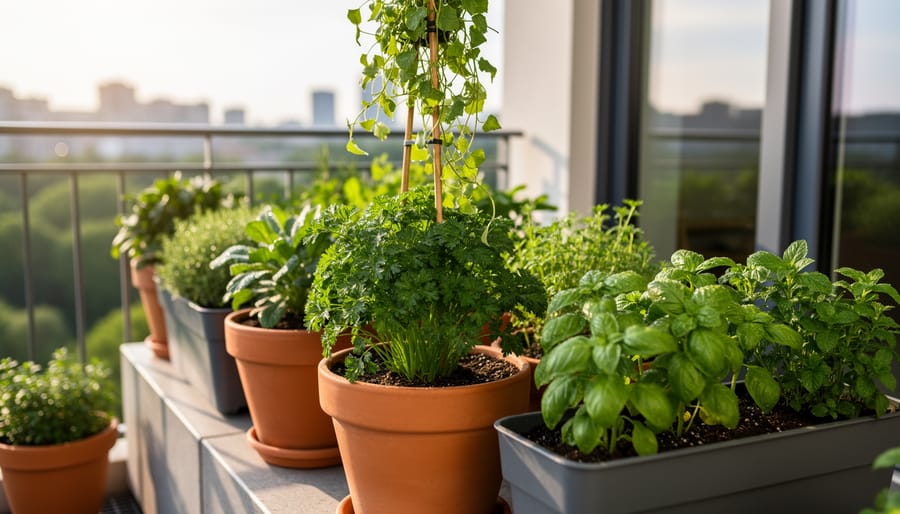
You can create a thriving garden in as little as one square foot by choosing the right containers, soil, and plants suited to your specific light conditions. Whether you’re working with a tiny apartment balcony, a narrow side yard, or just a sunny windowsill, small space gardening transforms limitation into creative opportunity. The method is straightforward: assess your available light (full sun, partial shade, or full shade), select containers with proper drainage, fill them with quality potting mix, and choose plants that match both your space and growing conditions.
The beauty of gardening in confined areas lies in its accessibility. You don’t need a sprawling backyard or years of experience to grow fresh herbs, colorful flowers, or even vegetables. Small spaces actually offer some surprising advantages. They’re easier to maintain, require less water, and allow you to experiment with vertical growing techniques that turn walls and railings into productive growing zones.
This guide walks you through everything you need to start your compact garden, from gathering the right materials to optimizing every inch of growing space. We’ll cover essential safety considerations often overlooked in container gardening, provide a clear step-by-step process for setting up your first plantings, and share space-maximizing strategies that seasoned urban gardeners use to increase their yields.
Small space gardening invites you to think like an artist and a problem-solver at once. Each pot becomes a brushstroke, each vertical trellis a sculptural element. The constraints of limited square footage push you toward inventive solutions that often result in more beautiful, more productive gardens than traditional plots. Ready to turn your cozy corner into a green retreat?
What You’ll Need to Get Started
You don’t need a garage full of equipment to start. A few well-chosen items will get your first containers planted and thriving, and you can add more as your garden expands.
Containers and Planters
Any vessel that holds soil and drains excess water works. Plastic pots are lightweight and affordable, making them ideal for balconies with weight restrictions. Fabric grow bags breathe well and prevent root circling. Wooden boxes add rustic charm but need drainage holes drilled in the bottom. Recycled buckets, crates, and even sturdy reusable grocery bags can work if you punch holes for water to escape.
Soil and Growing Medium
Regular garden soil compacts in containers and suffocates roots. You need a quality potting mix designed for container growing, which stays loose and drains properly while retaining moisture. Look for mixes labeled for vegetables or general purpose. Understanding garden soil basics helps you recognize what plants need, though container mixes differ from ground soil. Consider adding slow-release organic fertilizer to your mix from the start, or plan to feed plants every few weeks during the growing season. If you generate kitchen scraps, simple composting creates nutrient-rich material you can mix into containers.
Support Structures for Vertical Growing
Tomatoes, beans, cucumbers, and peas all climb when given the chance, freeing up horizontal space. Bamboo stakes, tomato cages, and small trellises attach to containers or mount on walls. Choose structures that match your space: a folding trellis works for renters, while permanent wall grids suit owned properties.
- Containers: Pots, grow bags, or wooden boxes with drainage holes
- Soil: Quality potting mix designed for containers, not garden dirt
- Support structures: Trellises, stakes, or cages for vertical growth
- Measuring tools: Tape measure and basic sun/shade tracker (even a phone works)
- Decorative elements: Paint, labels, or coordinating pot colors to match your aesthetic
Measuring and Planning Tools
A simple tape measure tells you exactly what fits where. Track sunlight patterns over a day using your phone’s timer or a notebook, marking which spots get full sun versus shade. This information determines what you can grow where.
Optional Artistic Touches
Small space gardens can be as beautiful as they are productive. Paint terracotta pots in colors that complement your outdoor decor. Add plant markers that double as art. Arrange containers at varying heights using upturned pots or plant stands to create visual interest. These creative elements transform a functional garden into a feature that enhances your entire outdoor area.
Before You Plant: Important Considerations
Before you get your hands dirty, pause to assess a few practical realities that could prevent expensive mistakes or safety issues down the road. Small space gardening often takes place on elevated surfaces or in rental properties, so a bit of upfront planning protects both you and your space.
First, check weight capacity if you’re gardening on a balcony, rooftop, or elevated deck. Saturated soil, ceramic pots, and water all add up quickly, a single large container can weigh over 100 pounds when wet. Most U.S. residential balconies are designed to meet balcony live load limits of 40 to 60 pounds per square foot, but older buildings or condos may have lower ratings. Distribute weight evenly across the surface and consider placing heavier containers near load-bearing walls or structural supports rather than cantilevered edges.
Next, address drainage to avoid damaging your space. Every container must have drainage holes prevent root rot and waterlogged soil, but runoff can stain surfaces, seep into cracks, or drip onto neighbors below. Use saucers under all pots and elevate containers slightly with pot feet to improve airflow and prevent standing water from discoloring decking or tile.
Assess your sun exposure honestly. Spend a day tracking how sunlight moves across your space, many balconies receive only three to four hours of direct light, which limits you to shade-tolerant greens and herbs rather than tomatoes or peppers. Note nearby buildings, overhangs, or trees that cast shadows at different times.
Finally, check building rules before you plant. Condo associations and landlords often restrict container weight, railing attachments, or water usage. Review your lease or HOA regulations, and ask permission for anything mounted or structural. A quick conversation now saves disputes later.
Step-by-Step: Creating Your Small Space Garden
Measure and Map Your Space
Grab a tape measure and spend a full day observing your space before buying a single seed. Start by recording the dimensions, length, width, and depth if you’re working with a ledge or shelf. Note any obstructions like railings, air conditioning units, or overhangs that limit where containers can sit.
Sunlight mapping matters more than you might expect. Set alarms for 9 a.m., noon, 3 p.m., and 6 p.m., then mark which areas receive direct sun at each check-in. You need at least six hours for fruiting vegetables like tomatoes and peppers, while leafy greens tolerate four. Use your phone to snap photos at each interval, the visual record helps when you’re standing in a garden center later, wondering if that sunny corner really gets enough light.
Walk your space at different times to measure daily direct sun and spot microclimates. That protected corner near your building might stay five degrees warmer than the exposed edge. Morning sun differs from afternoon blaze, east-facing spots suit cool-season crops, while west-facing areas support heat lovers.
Sketch a simple overhead map on graph paper or your phone. Mark sunny versus shady zones, note where wind hits hardest, and indicate water access points. This rough diagram becomes your reference when deciding where to place heavy containers versus hanging baskets, and which plants go where. Accurate measurements prevent the frustration of buying containers that don’t fit or misjudging how many plants your space can actually support.
Choose Smart Plants for Limited Spaces
The secret to thriving in a compact garden isn’t cramming in as many plants as possible, it’s choosing varieties bred to perform in tight quarters. Start by reading plant tags carefully. Look for descriptors like “compact,” “dwarf,” “bush type,” or “patio.” These aren’t marketing gimmicks; they indicate cultivars specifically developed for container growing and limited root space.
For vegetables, prioritize high-yield plants that produce repeatedly rather than once-and-done crops. Cherry tomatoes, bush beans, lettuce varieties, radishes, and compact pepper plants deliver impressive harvests from single containers. Herbs like basil, thyme, and parsley are naturals for small spaces, producing continuously when you harvest regularly. Avoid sprawling plants like traditional pumpkins or full-size melons unless you have substantial vertical support.
Match plants to your actual light conditions, not your aspirations. If your balcony gets four hours of direct sun, you’re working with partial shade, choose leafy greens, herbs, and shade-tolerant varieties rather than forcing sun-loving tomatoes to struggle. Plant tags list light requirements; trust them. Full sun means six-plus hours of direct light, partial sun is four to six hours, and shade is under four hours. Mismatching light and plants wastes time and container space you can’t afford to lose.
Check mature sizes and growth habits before buying. A plant labeled “determinate” or “bush” stays compact; “indeterminate” or “vining” types sprawl and need trellising. Transplants may look similar at purchase, but their adult forms differ dramatically. Measure twice, plant once, knowing a tomato will reach five feet tall versus eighteen inches determines whether it fits your setup or overwhelms it.
Design Your Vertical Growing System
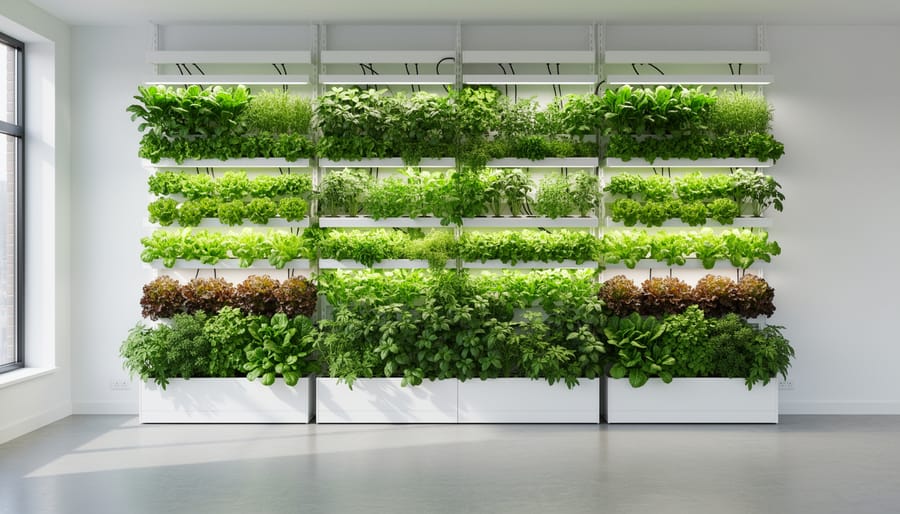
Vertical systems are your secret weapon for turning a few square feet into a full-scale growing operation. Start with a sturdy trellis anchored to your wall or railing, look for one rated to support at least 15 pounds when wet. Position it where climbing plants like cucumbers, pole beans, or cherry tomatoes will get six hours of direct sun. Mount it securely; a collapsed trellis mid-season is both heartbreaking and messy.
Wall-mounted planters work brilliantly for herbs and greens. Attach them at different heights to create visual interest and capture varying light angles throughout the day. Make sure each planter has drainage holes and that your wall can handle the weight when soil is saturated. A 12-inch wall planter filled with wet potting mix weighs around 20 pounds.
Tiered systems maximize footprint without adding width. Three-shelf plant stands or stackable containers let you grow lettuce on top, peppers in the middle, and shade-tolerant herbs below. Place taller plants on lower tiers so they don’t block light from reaching everything else.
Hanging baskets suspended from sturdy hooks expand your growing zone overhead. They’re perfect for strawberries, trailing cherry tomatoes, and cascading flowers. Water them last since they dry out fastest, twice daily in hot weather isn’t unusual.
The key is thinking in layers rather than acres.
Set Up Containers and Plant
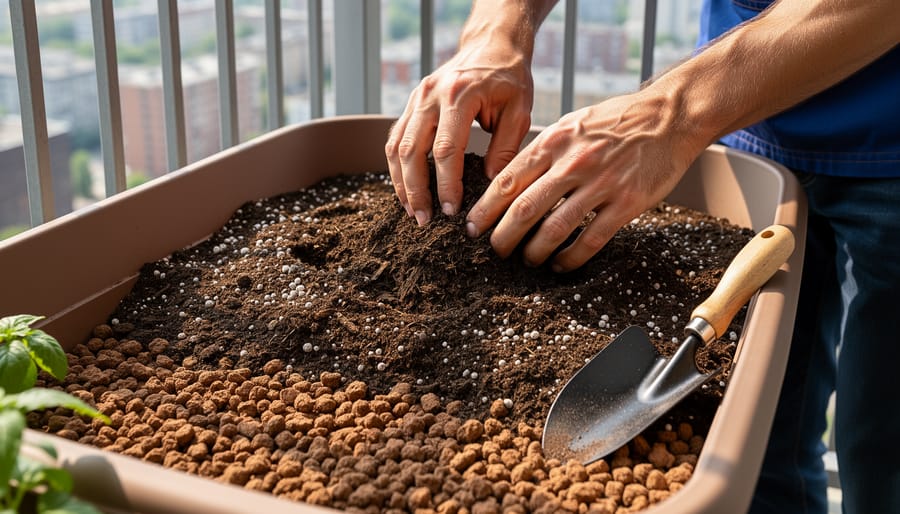
Start by adding drainage material to the bottom of your container, a layer of small stones or broken pottery pieces works well. Fill with quality potting mix designed for containers, not garden soil, leaving about an inch of space from the rim to prevent overflow when watering. The mix should feel light and crumbly, allowing roots to breathe and water to drain freely.
Before planting, arrange your seedlings or transplants in their nursery pots on the soil surface to plan your composition. Consider both practical spacing and artistic appeal. Taller plants typically anchor the back or center, while trailing varieties cascade over edges. Most compact vegetables need six to eight inches between plants, but always check the tag for variety-specific requirements.
Create a planting hole slightly deeper than the root ball, gently loosen tangled roots, and nestle each plant at the same depth it grew in its nursery pot (tomatoes are an exception, they benefit from deeper planting). Firm the soil around the base to eliminate air pockets without compacting it too tightly.
Water thoroughly right after planting until moisture drains from the bottom holes. This initial soaking helps soil settle around roots and reduces transplant shock. For ongoing care throughout the growing season, follow proven watering tips to keep your container garden healthy without overwatering.
Think of your container as a miniature landscape. Mix textures, heights, and leaf shapes to create visual interest that’s as appealing as it is productive.
Checking Your Success and Next Steps
Within two to three weeks, you’ll see clear signs your small space garden is working. New leaves should be bright green and perky, not yellowed or drooping. Soil should feel moist an inch below the surface but never waterlogged. If stems stretch tall and spindly toward light, move containers to a sunnier spot. Yellowing lower leaves often mean you’re overwatering, while crispy leaf edges suggest the opposite.
Once your initial plants establish, consider expanding your skills. Try adding one or two unfamiliar varieties each season, or experiment with succession planting to keep containers productive. Many small space gardeners eventually grow from seed to access unusual cultivars and cut costs. Keep notes on what thrives in your specific microclimate so you can refine your plant choices year after year.
The GardenSculpt community forum offers ongoing support as your garden evolves. Share photos of your setup, ask questions when problems arise, and browse design galleries for fresh inspiration. You’ll find fellow small space gardeners tackling similar challenges, from balcony weight limits to apartment HOA negotiations. The collective knowledge helps you troubleshoot faster and discover creative solutions you wouldn’t think of alone.
Start where you are, grow what excites you, and adjust as you learn what works in your unique space.
Making the Most of Different Small Spaces
Each type of small space comes with unique opportunities and constraints. A balcony might offer abundant sunlight but strict weight limits, while a windowsill provides convenience with minimal area. Tailoring your approach to your specific setting makes the difference between a struggling garden and a thriving one.
Balconies benefit from railings that double as vertical supports. Attach railing planters directly to the rails for herbs and greens, freeing floor space for larger containers. Check your building’s weight capacity before adding multiple heavy pots, and always use saucers to catch drainage. Wind can be intense at higher floors, so stake taller plants and choose compact varieties. For more detailed strategies, explore our comprehensive balcony garden tips to maximize every inch.
Patios and decks offer the most flexibility since they typically handle more weight and provide ample floor space. Create zones by grouping containers of varying heights, tall pots in back, medium in the middle, low-growing herbs up front. Leave walkways clear for access. If your patio gets partial sun, position shade-tolerant plants like lettuce on the north side and sun-lovers like tomatoes where light hits longest.
Rooftops require wind-resistant setups and secure anchoring. Heavy containers act as ballast, but always check load ratings with your building management. Exposed roofs get intense sun and dry out quickly, so choose heat-tolerant plants and install drip irrigation or self-watering containers if you can’t water daily.
Windowsills work best for shallow-rooted herbs and microgreens. Mount window boxes securely to exterior sills, or place small pots on interior sills that get at least four hours of direct light. South-facing windows offer the most growing potential.
Vertical walls transform unused surfaces into productive gardens. Install modular wall planters or felt pocket systems, ensuring proper waterproofing behind them. Trailing plants like strawberries and cascading herbs look especially striking while maximizing your harvest from minimal square footage.
Your Small Space Gardening Questions Answered
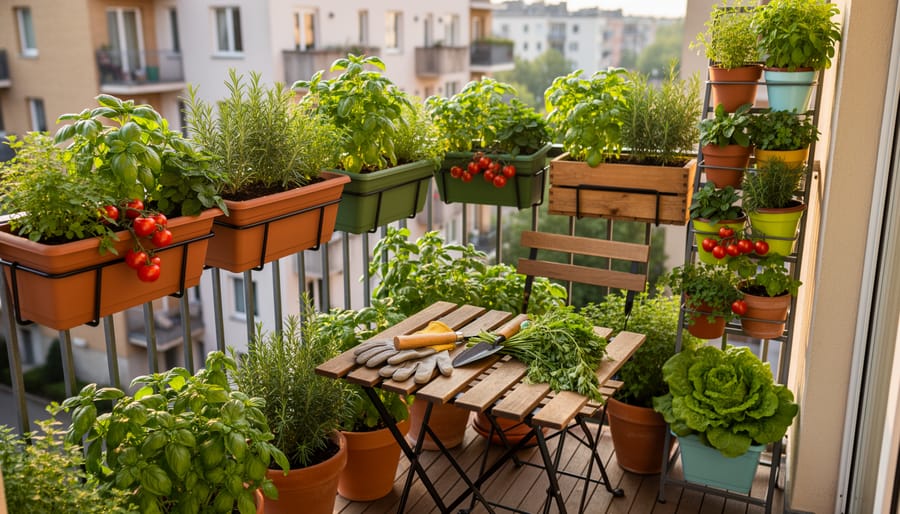
The questions below come up in nearly every small space gardening conversation I’ve had with beginners. They’re the practical worries that stop people from planting that first container, so let’s address them directly.
What vegetables give the best yield in containers?
Tomatoes, lettuce, radishes, peppers, and herbs like basil consistently deliver excellent harvests in containers. Cherry tomato varieties and leafy greens are especially forgiving for beginners because you can harvest continuously rather than waiting for a single crop.
How often should I water container gardens?
Most containers need watering once daily during warm weather, sometimes twice on hot days since pots dry out faster than ground soil. Stick your finger two inches into the soil, if it’s dry at that depth, it’s time to water.
Can I garden in winter in a small space?
Absolutely, though your options shift to cold-hardy greens like kale, spinach, and arugula, plus you might need to move containers to protected spots or add simple cold frames. Many herbs also tolerate light frosts and can extend your growing season into late fall.
Do I need expensive containers?
Not at all, repurposed buckets, wooden crates, fabric grow bags, and even sturdy reusable shopping bags work beautifully as long as you drill drainage holes. Save your budget for quality soil and healthy starter plants instead.
Beyond these basics, pest management worries many balcony gardeners. The good news is that elevation naturally reduces some ground-dwelling pests, but aphids and whiteflies still find their way up. Regular inspection catches problems early, look under leaves weekly and rinse small infestations off with water. Companion planting works in tight quarters too: tucking marigolds or nasturtiums between your vegetables adds color while deterring certain insects.
Container depth confuses newcomers, but the rule is simpler than you’d think. Shallow-rooted crops like lettuce and herbs thrive in six to eight inches of soil, while tomatoes and peppers want at least twelve inches for their root systems. When space is tight, prioritize depth over width, a tall, narrow pot outperforms a wide shallow one for most vegetables.
If your first season doesn’t go perfectly, you’re in good company. Every gardener kills a few plants while learning their specific conditions. The GardenSculpt community forum is full of members troubleshooting together, sharing what worked on their particular balcony or patio, and celebrating small victories. That collective knowledge, real experiences from real small spaces, often proves more valuable than any general guide.
You’ve just taken the first step toward a more sustainable, beautiful living space, one that doesn’t require a sprawling backyard. Small space gardening proves that square footage never limits what you can grow or create. Whether you started with a single herb pot on a windowsill or mapped out a full balcony setup, you’re now part of a growing movement of urban gardeners turning tight quarters into thriving green spaces.
Don’t feel pressured to build everything at once. Start with one container this week. Plant something you’ll actually use. Watch it grow. Then add another when you’re ready. Gardening scales perfectly to your available time, space, and energy.
Your journey doesn’t end here. The GardenSculpt community forum is filled with fellow small space gardeners eager to swap tips, troubleshoot challenges, and celebrate your first harvest. Share a photo of your setup, ask questions about stubborn plants, or browse through hundreds of creative solutions others have discovered. We’ve built this space specifically for gardeners like you, people transforming tiny spots into productive, artistic sanctuaries. Come join us, share your progress, and let’s keep growing together.