
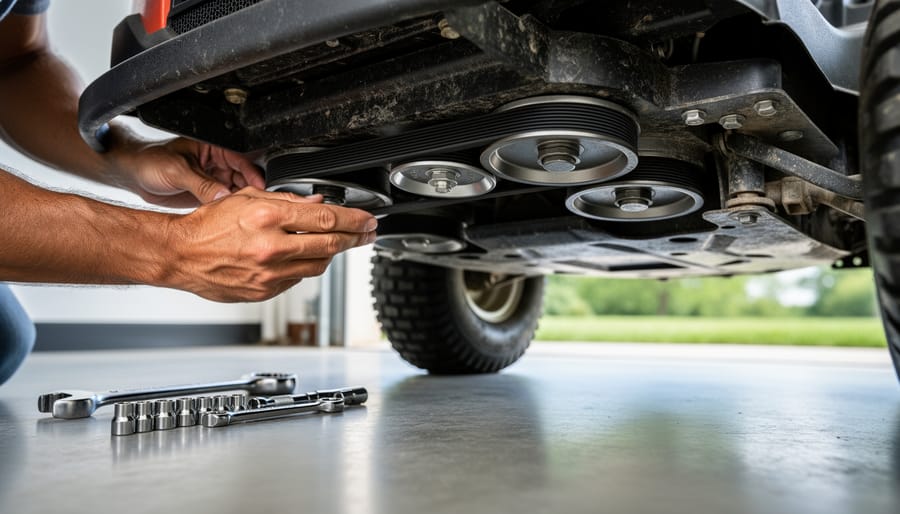
A worn or broken deck mower belt is one of the most common reasons your mower stops cutting properly, and replacing it yourself takes about 30 to 45 minutes with basic hand tools. This repair typically costs under $40 for the belt and saves you a costly trip to the repair shop. The deck belt connects your mower’s engine power to the cutting blades, so when it slips, cracks, or snaps, your blades won’t spin no matter how smoothly the engine runs.
Most homeowners notice the problem when grass stops getting cut evenly or when they hear a squealing sound during operation. The good news? Swapping out a deck belt requires no special mechanical expertise, just a few sockets, a bit of patience, and the right replacement belt for your mower model. You’ll be back to maintaining your lawn’s curb appeal the same afternoon you start the job.
This guide walks you through the complete process, from gathering your tools and safely preparing the mower to threading the new belt around pulleys and spindles. We’ll show you how to verify the repair worked and share maintenance tips to extend your new belt’s life well beyond a single season.
What You’ll Need: Tools and Materials
Before you get started with your deck mower belt replacement, gather everything you’ll need so you’re not making frustrating mid-project trips to the hardware store. Having the right tools within reach makes this job flow smoothly and helps you work safely.
Essential Tools and Materials:
- Socket wrench or adjustable wrench setFor removing deck pins, brackets, and accessing pulleys (sizes vary by mower model, typically 1/2″ to 3/4″)
- Work glovesProtect your hands from sharp edges under the deck and hot components
- Replacement deck mower beltMatch your mower’s exact model number; check your manual or the old belt’s printed specifications for the correct size
- Safety glassesShield your eyes from debris and spring-loaded components
- Flashlight or headlampEssential for seeing belt routing and pulley details in the shadowy space under the deck
- Clean rag or shop towelFor wiping away grass buildup and checking pulley condition
- Wooden block or jack stands (optional but recommended)Safely elevate the mower for better access if needed
- Camera or smartphone (optional)Snap a quick photo of the old belt’s routing before removal, a lifesaver when threading the new one
- Belt installation tool or large screwdriver (optional)Helps leverage stubborn belts onto pulleys without excessive force
The replacement belt is your most critical purchase. Don’t guess or grab a “universal” belt that looks close enough. Your mower’s model number, usually found on a plate near the engine or under the seat, tells you the exact belt specification you need. Many auto parts stores and garden centers can look this up for you, or you can order directly from the manufacturer to guarantee a perfect fit.
Safety First: What to Check Before You Start
Before you grab your tools, take a few minutes to set up a safe workspace. Working under a mower deck involves sharp blades, heavy components, and potential pinch points, so proper preparation isn’t optional, it’s essential for protecting yourself and doing the job right.
Start by disconnecting the spark plug wire and securing it away from the plug. This single step prevents accidental engine starts while your hands are near the blades. If you’ve just finished mowing, let the engine and deck components cool completely, exhaust parts and metal housings can stay hot enough to burn for 30 minutes or more after shutdown.
Position your mower on level, solid ground in a well-lit area where you’ll have room to move around comfortably. Concrete or firm packed earth works better than grass or gravel, which can shift under you. If you’re using jack stands or ramps to access the underside, make absolutely certain they’re rated for your mower’s weight and positioned securely, a falling mower can cause serious injury.
Wear work gloves to protect your hands from sharp blade edges and rough metal surfaces, and keep safety glasses on throughout the job. Even old belts can snap back unexpectedly when tension releases, and debris hiding in the deck can fall into your face as you work. Long sleeves and closed-toe shoes add another layer of protection against scrapes and cuts. Take your time with these precautions, and you’ll tackle the belt replacement with confidence rather than worry.
Understanding Your Deck Mower Belt System
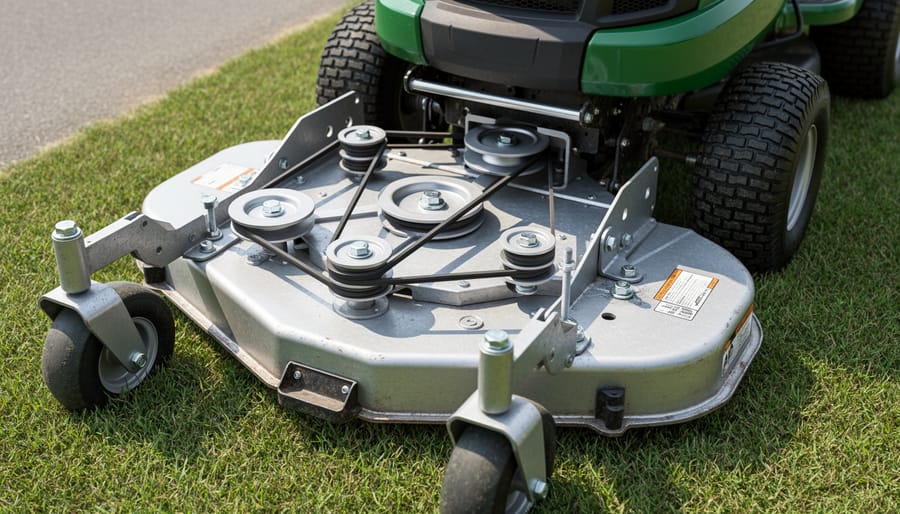
Your deck mower belt is the unsung hero that makes cutting grass possible. When you engage the mower blades, this rugged belt transfers power from your engine’s pulley down to the cutting deck, where it wraps around one or more spindle pulleys connected to the blades. Think of it as the messenger between your mower’s power source and the actual cutting action, without it, the engine runs but nothing spins beneath you.
Most riding mowers and zero-turn mowers use either a single-belt or dual-belt configuration. A single belt does all the work, looping from the engine through an idler pulley (which maintains tension) to the spindles. Dual-belt setups split the job: one belt drives the main spindles while a second handles the engagement system or extra blades. Both designs rely on constant tension and friction to work properly, which is why belts gradually stretch, crack, and wear down over time.
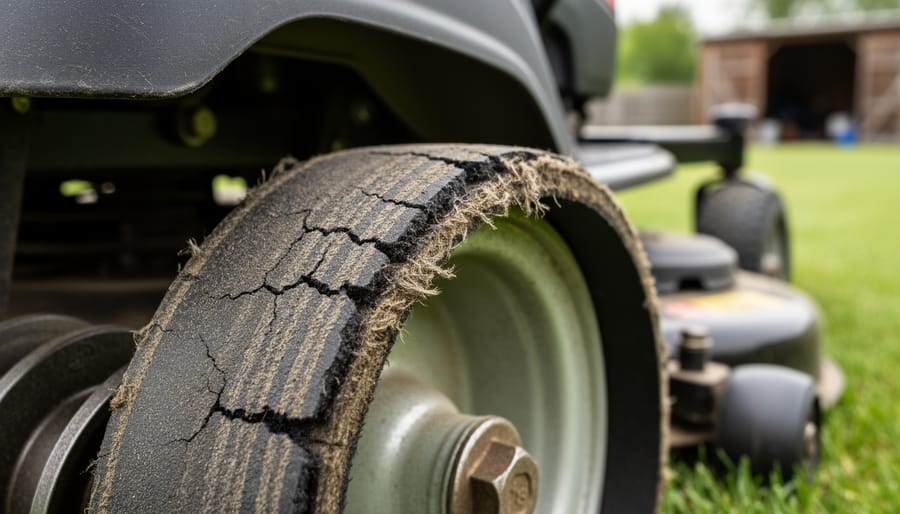
Regular maintenance matters because belt failure is rarely dramatic, it’s gradual. You might notice the blades spinning slower, a high-pitched squeal when you engage the deck, or visible cracks along the belt’s surface. Catching these warning signs early means you replace the belt on your schedule, not when it snaps during the last row of your lawn. A quick inspection every few weeks takes seconds and saves you from digging into an emergency repair when the grass is tall and time is short.
Step-by-Step: Replacing Your Deck Mower Belt
Step 1: Access the Mower Deck
The first step is accessing the deck where your belt lives, and the good news is that most mowers make this surprisingly straightforward.
Start by lowering your mower deck to its absolute lowest cutting height using the deck height adjustment lever. This creates slack in the belt and gives you more working room underneath. You’ll find this lever near the driver’s seat or on the fender, depending on your mower model.
Next, locate the deck attachment points. Most riding mowers use either lift links with hairpin clips, J-hooks that slide out, or bolt-on brackets at the front and sides. Check your owner’s manual if you’re unsure which type you have. Slide under the mower slightly (with the engine off and cool) to spot these connections.
For many models, you won’t need to fully remove the deck, just disconnect one side and slide it partway out. Zero-turn mowers often require removing front hangers first, then rolling the deck out from underneath. Take a quick photo of the attachment points before disconnecting anything; it makes reassembly much easier and saves you from that “where did this piece go?” moment later.
Step 2: Release Tension and Remove the Old Belt
With the deck accessible, your next task is releasing the belt tension. Look for the idler pulley, a spring-loaded wheel that keeps the belt taut during operation. On most mowers, you’ll spot it near the center or side of the deck, connected to a tension arm or spring.
Use a wrench or socket to gently rotate the idler pulley arm against its spring tension, moving it away from the belt. This creates enough slack to slip the belt off the pulleys. Some models have a tension rod you pull or push instead. Hold firm pressure while you work, the spring will want to snap back.
Before removing the old belt completely, take a quick photo with your phone showing how it routes around each pulley. This visual reference proves invaluable when threading the new belt. Alternatively, sketch a simple diagram noting which pulleys the belt wraps around and whether it sits on top or underneath each one.
Slide the worn belt off all pulleys and set it aside for comparison with your replacement.
Step 3: Inspect Pulleys and Components
With the old belt removed and everything exposed, take a few moments to examine the pulleys, spindles, and tension springs. Run your fingers along each pulley groove to feel for wear, cracks, or rough spots that could damage a new belt. Spin each pulley by hand, it should rotate smoothly without wobbling or grinding noises. Check the tension spring for rust or stretching, and look for any debris wrapped around spindle shafts.
This quick inspection catches hidden problems before they shorten your new belt’s life. A worn pulley or weakened spring will cause premature belt failure, so replacing suspect components now saves you from repeating this job in a few weeks. Wipe away grass clippings and built-up grime while you’re here, clean components help everything run smoother and last longer.
Step 4: Route the New Belt Correctly
With the old belt removed and everything inspected, it’s time to thread your new deck mower belt. Before you start, grab your phone and snap a photo of any routing diagram stuck to the underside of your mower deck, these faded stickers are lifesavers, but they’re easy to miss when you’re focused on the work.
Start at the engine pulley and work your way around, following the path you noted earlier. The belt needs to sit deep in each pulley groove, not riding high on the edges. Most configurations loop around the engine drive pulley first, then thread through one or more blade spindle pulleys before wrapping around the idler pulley last.
Take your time here. A misrouted belt won’t engage properly and can damage pulleys or burn through the new belt quickly. If you’re uncertain about the path, check your owner’s manual for a routing diagram, it’s worth the extra two minutes to get it right. The belt should feel snug around each pulley without forcing it.
Step 5: Restore Tension and Secure the Deck
With the new belt properly routed, it’s time to bring everything back together. This step requires a bit of finesse, but you’ve got this.
First, re-engage the tension system you released earlier. If your mower uses an idler pulley with a spring-loaded arm, gently pull the arm back and let the spring take over, you should feel it snap into position, creating firm tension across the belt. For models with a manual tension bolt, tighten it gradually while checking that the belt sits evenly in all pulley grooves. The belt should feel taut but not over-stretched; you want about half an inch of give when you press down on the longest span between pulleys.
Now reattach the mower deck. Line up the deck hangers with the mower’s suspension points and secure them with the pins or brackets you removed earlier. If you lowered the deck rather than removing it completely, raise it back to normal cutting height using the deck adjustment lever. Give each connection point a gentle tug to confirm everything’s locked in place, wobbly attachments mean trouble later.
Step 6: Clean Up and Dispose Responsibly
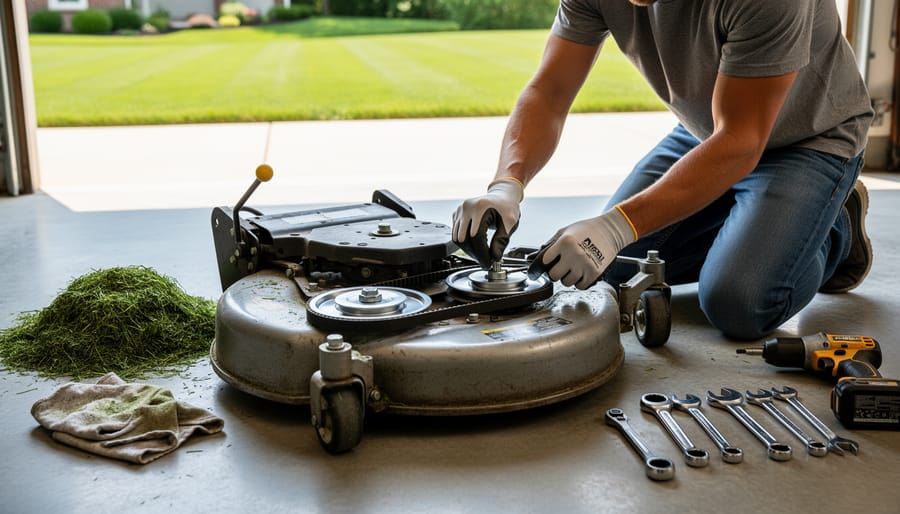
With your new deck mower belt installed and tested, take a few minutes to clean up your workspace. Gather all tools and put them back where they belong, now’s a good time to wipe off any grease or grass clippings that accumulated during the job. Check around and under the mower for stray bolts, clips, or debris that could interfere with operation or attract rodents during storage.
Don’t just toss the old belt in the trash. Many recycling centers accept rubber belts, or you can check if your local auto parts store has a recycling program. Some garden centers and hardware stores also collect worn belts for proper recycling. If recycling isn’t available in your area, wrap the old belt in newspaper before disposal to prevent it from tangling with other waste.
A tidy workspace makes your next maintenance task easier and keeps your garden shed organized and welcoming. Plus, responsible disposal reflects the care you put into maintaining both your equipment and the environment.
Testing Your Work: How to Verify the Belt Is Working
With the new belt in place, you’ll want to confirm everything’s working before tackling your lawn. Start by reconnecting the spark plug and checking that all guards and covers are secure. Sit in the driver’s seat, start the engine, and let it idle for about thirty seconds. With the mower stationary on level ground, engage the blade deck at its lowest throttle setting.
Listen carefully. A properly installed belt runs quietly with a steady hum. If you hear squealing, clicking, or grinding, shut off immediately, something’s misaligned or the tension isn’t quite right. Watch the deck housing for vibrations or wobbling, which suggests uneven pulley engagement.
Next, disengage and re-engage the blades a few times. The transition should feel smooth without hesitation or slipping. If the blades seem slow to reach full speed, the belt may need additional tension adjustment (refer back to your tension spring position).
When everything sounds good, take a slow test pass over a small patch of grass. The cut should be even and clean, setting you up for beautiful mowing patterns that showcase your sustainable garden design. No slipping, no missed patches, just smooth, reliable performance that tells you the job’s done right.
Routine Maintenance Tips to Extend Belt Life
Keeping your deck mower belt in top shape doesn’t require constant fussing, just a few smart habits between mowing sessions. After you’ve successfully replaced your belt, these simple maintenance practices will help you get the most miles out of it before the next swap.
Start by making quick visual checks part of your mowing routine. Before you fire up the mower each time, glance at the belt for cracks, fraying edges, or glazed surfaces that look shiny and hard. Catching these early signs means you can replace the belt on your schedule, not when it snaps mid-mow on Saturday morning. While you’re at it, brush away grass clippings and debris from around the pulleys and under the deck, this buildup creates friction and heat that wear belts down faster than normal use.
Regular maintenance schedule:
- Inspect belt condition before each mowing session during peak season
- Clean debris from pulleys and deck underside weekly or after every 3-4 mows
- Check belt tension monthly, it should deflect about half an inch when pressed
- Lubricate pulley bearings according to your mower manual, typically once per season
- Store mower in a dry location during winter to prevent belt degradation from moisture
Pay attention to how your mower sounds and performs. A squealing noise when you engage the blades or uneven cutting patterns often signal a slipping belt that needs attention. If you notice the belt riding up on pulley edges rather than sitting centered in the grooves, adjust the deck alignment before the belt wears through. When storing your mower for winter, consider releasing belt tension if your model allows it, this prevents the belt from developing a permanent set or memory that reduces its effectiveness come spring. These small efforts add up to significantly longer belt life and fewer surprise breakdowns during your busiest gardening months.
Common Questions About Deck Mower Belt Maintenance
How often should I replace my deck mower belt?
Most deck mower belts last 2-3 seasons with regular use, but inspect yours at the start of each mowing season. If you notice cracks, fraying, glazing, or slipping during operation, replace it immediately regardless of age.
What causes a deck mower belt to wear out prematurely?
Common culprits include mowing tall, wet grass that creates extra resistance, debris buildup around pulleys, misaligned spindles, and worn bearings. Even something as simple as grass clippings mixing with gardening soil can cake onto pulleys and accelerate wear.
Can I use a universal or generic replacement belt?
While some universal belts claim to fit multiple models, it’s safer to use the exact belt specified in your mower’s manual. An incorrect width, length, or profile can cause slipping, poor cutting performance, or damage to pulleys and spindles.
Why does my new belt keep slipping or squealing?
This usually means either insufficient tension (check the spring or idler pulley), incorrect routing, or oil contamination on the belt or pulleys. Clean all surfaces with a degreaser and verify you’ve followed the correct belt path diagram.
These questions come up repeatedly in gardening forums, and they’re worth addressing before you find yourself stuck mid-season. If your specific issue isn’t covered here, don’t hesitate to reach out to the GardenSculpt community, chances are someone has tackled the same problem and found a solution.
Replacing your deck mower belt might have seemed daunting before you started, but now you’ve proven you can handle this essential maintenance task yourself. You’ve saved a trip to the repair shop, kept money in your pocket, and extended your mower’s working life, all while gaining confidence in your DIY abilities.
Regular belt maintenance means more than just a functioning mower. It translates to cleaner cuts, a healthier lawn, and fewer frustrating breakdowns mid-season when your garden needs attention most. You’re now equipped to spot warning signs early and address them before small issues become expensive problems.
Every gardener’s experience is unique, and we’d love to hear about yours. Did you encounter any surprises during your belt replacement? Have you discovered maintenance tips that work particularly well? Perhaps you’re facing a challenge we haven’t covered here. Head over to the GardenSculpt community forum to share your story, ask questions, or help fellow gardeners tackle their own mower maintenance. Your insights might be exactly what someone else needs to hear, and together we’ll keep our gardens thriving and our tools running smoothly season after season.